Create a gun mod
Note: The prefixes used in the tutorial are "WMD_", which can be replaced with your own prefix, and you will need to change the prefix in the AddressableConfig(Assets/Resources/AddressableConfig) file. Once you have changed the prefix, you will need to fill in your new prefix instead of "WMD_" in the tutorial.
Phase 1: Define your mod#
1. New mod project#
Make sure you have the prerequirements for modding and download a fresh ModToolkit to start.
- Download & Install Unity Hub.
- Download & Install Unity (2020.3.48f).
- Download the Battle Talent ModToolkit. (Wanna use git? Check out the repo!)
- Open the downloaded ModToolkit in Unity.
2. Remove unused content#
Make sure to remove the demo content so that we have a clean project to start with.
- In the Unity toolbar; click
Tools > Destructive > Cleanup All Content.
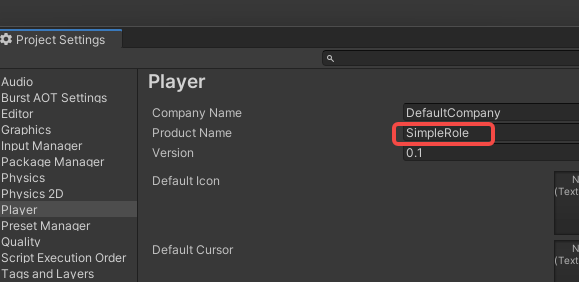
3. Product name#
Change the product name so that the mod folder name will not conflict with other mods.
- In the Unity Toolbar: Go to
Edit -> Project Settings -> Player. - Modify field
Product Nameto your new mod name. Use the format:YOURPREFIX_MyModName. Example:WMD_ChevalierWeapons
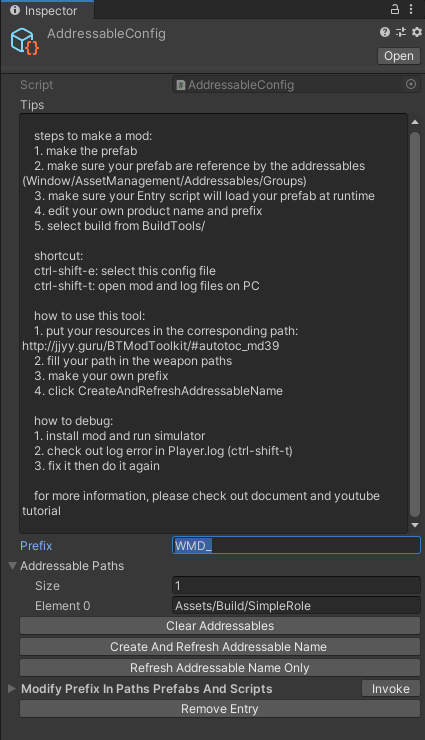
4. Prefix.#
Change the project prefix so that the mod files will not conflict with other mods.
In the Unity file browser: Open
Assets -> Resources -> AddressableConfig.assetModify field
Prefixto your new prefix name. Use the format:YOURPREFIX_MyModName_. Example:WMD_ChevalierWeapons_Note: The prefix used in the tutorial is
WMD_. You will need to fill in your new prefix instead of everyWMD_in the tutorial.
5.Generate folder structure using the template wizard.#
- In the Unity Toolbar: Go to
Tools -> Template Wizard. - Make sure the
inspectorwindow is shown (Template Wizard will show there). - Enter a
new mod folder name. Example:YourModName - Set the
Mod Typeto:Gun. - Fill in the desired
ItemInfoConfigfields. - Click the
Generate Templatebutton to generate theGunfolder structure.
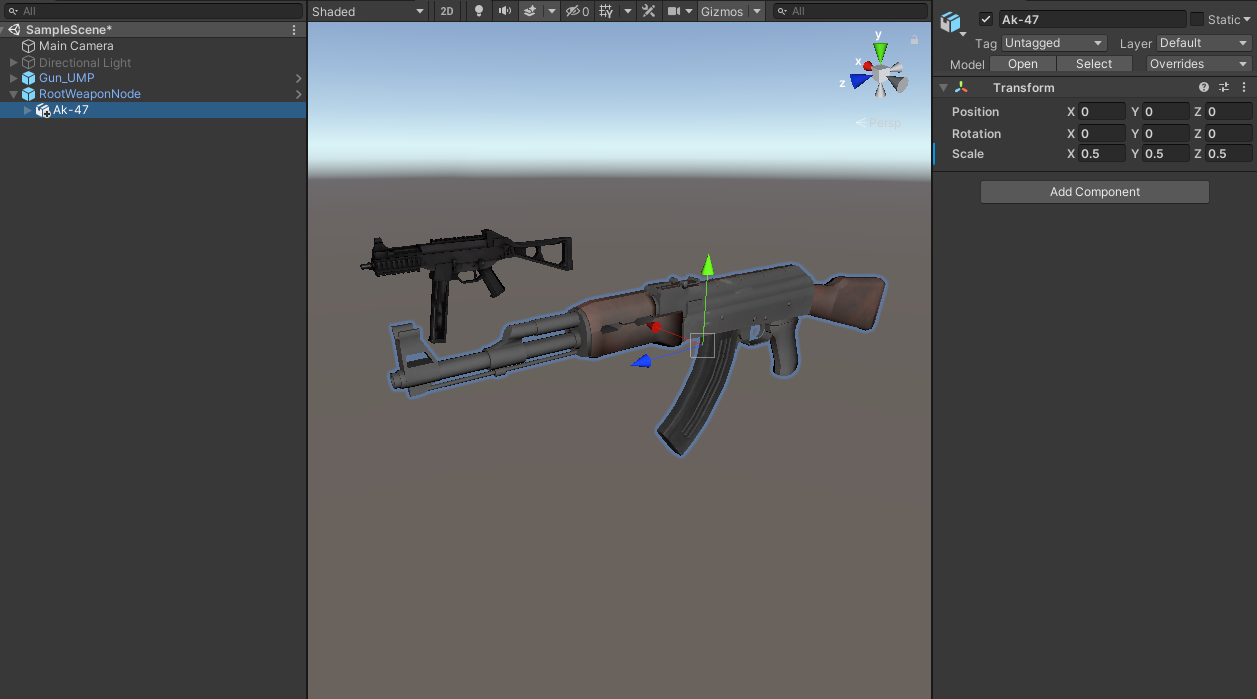
6.Place the model#
- Open the newly created prefab in the
Weaponfolder. - Drag your model of the gun into the prefab hierarchy under the parent object.

(Explanation: Parent object is the top object of the prefab. It will be called the same as the name of your prefab.
(Example: Prefab file is calledNewModFolderName.prefab. parent object will be calledNewModFolderName). - Rotate the model and resize the weapon until it feels ok in comparison to the dummy weapon.
- Under
InteractWeapon, clickshow example weaponagain to disable the example weapon. - Reference the MeshRenderer from the model to Skill Change Colors. (quick tips: if you want to place multiple renderer at the same time, you can click the lock button to lock the inspector, then drag them all at once) (the Skill Change Colors will be used for change weapon color when it's needed, such as damaged).
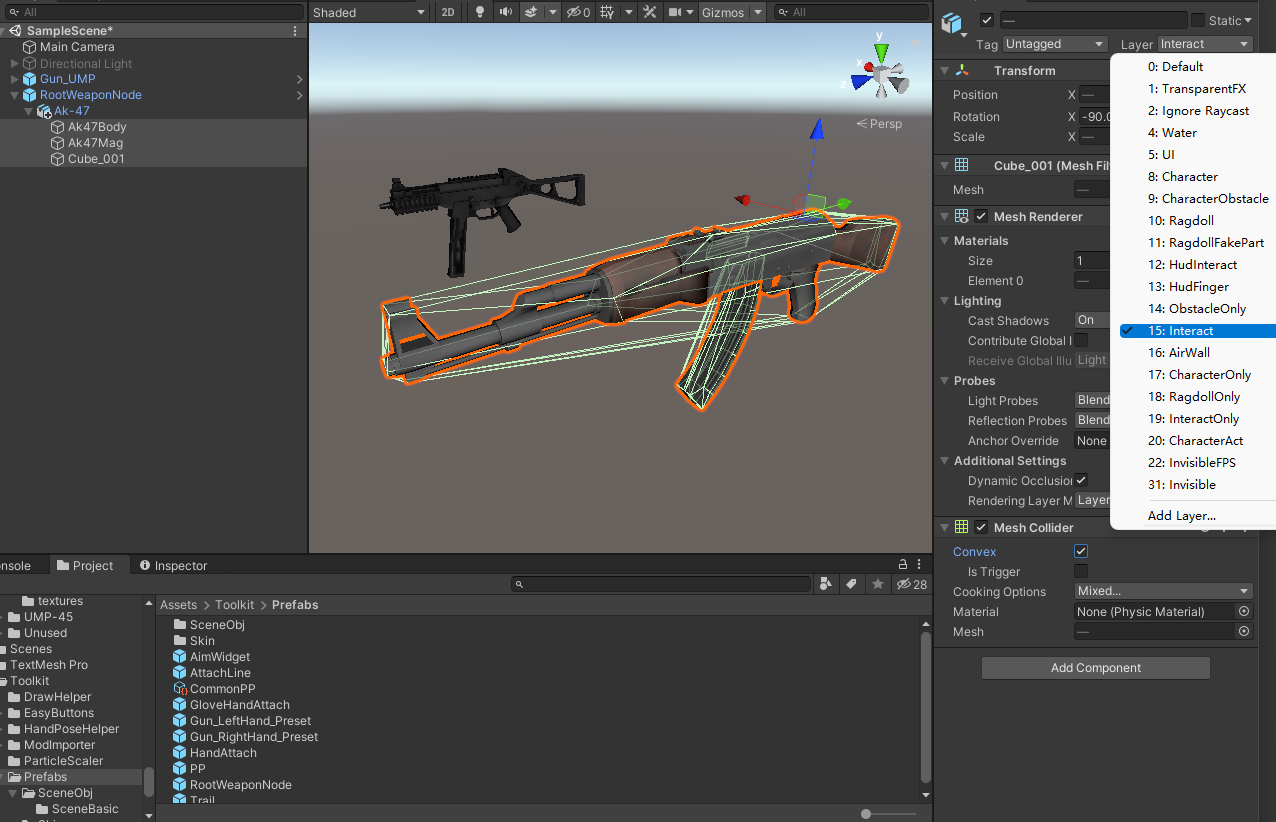
7.Add Collider for colliding#
- Click Add Component to add Mesh Collider.
- select Convex and change default layer to Interact layer.
(quick tips: if you want accurate collision, we recommend Collider Creator in the unity asset store, but it's not free.)
8. Define HitInfo and CollisionEffect#
In short, RagdollHitInfoObj defines how a collider deals damage and CollisionEffect defines what's the collision physics material is.
- Change the values in
RagdollHitInfoObjandCollisionEffectas (shown in screenshot) on the Parent Object. (Possible options to enter here are can be found on this page: HitInfo and CollisionEffect
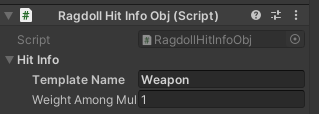
- Then add these components(
RagdollHitInfoObjandCollisionEffect) to the handle as well to distinguish hits between blade and handle.

(Explanation: To learn more about RagdollHitInfoObj and CollisionEffect, please read HitInfo and CollisionEffect.)
9.Add HandAttach for grabbing#
HandAttachis already added for you by the template wizard.- Explanation:
HandAttachdescribes how your hand grabbing it.
Drag a HandPoseHelper from the path Asset/Toolkit/HandPoseHelper to the scene and set the HandAttach reference to the HandPoseHelper's HandAttach

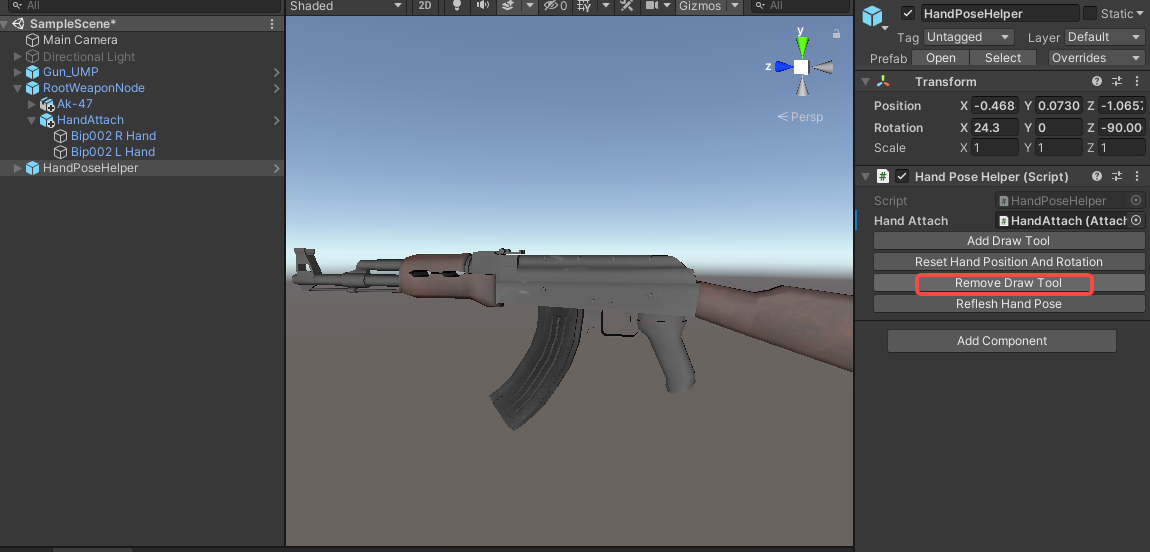
Click on AddDragTool and you can see the hand appear in the scene.
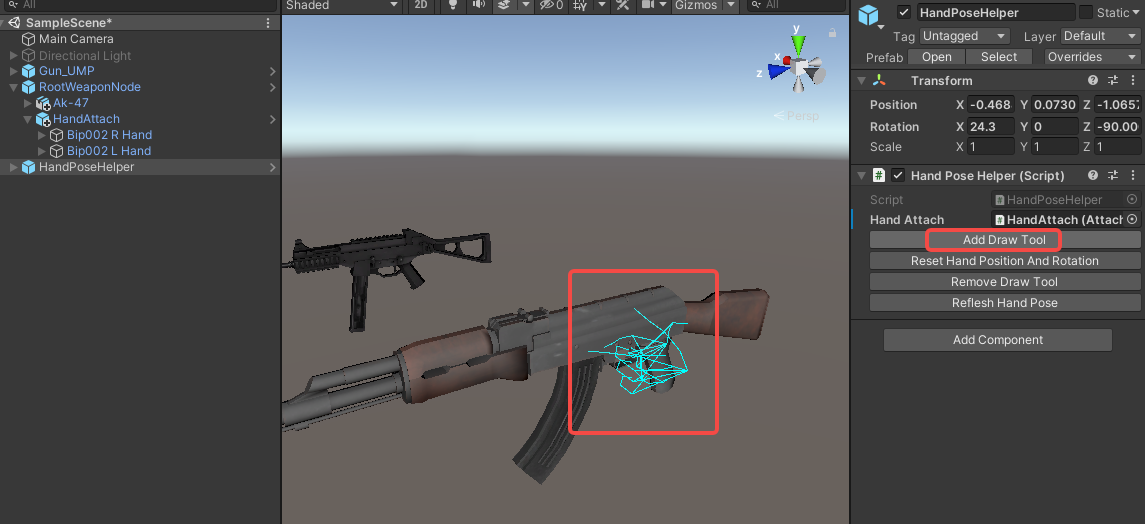
Adjust the angle of the HandAttach according to the hand.
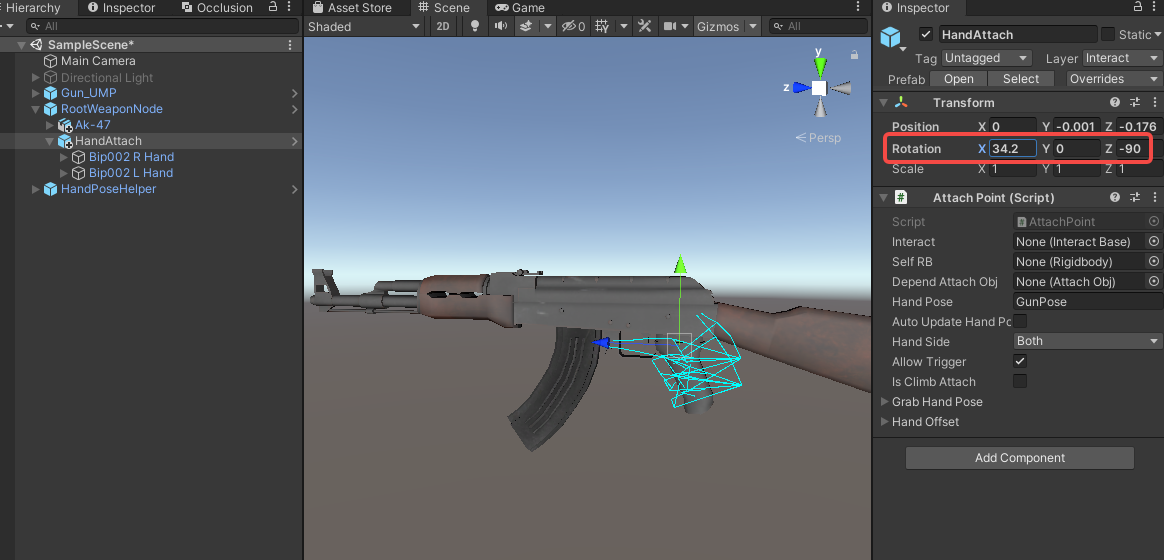
Click RemoveDrawTool to remove the hand.
7. Add MountPoint for backpack#
MountPoint will determine where it will mount to your inventory slots like belt or back.
- A MountPoint is already added for you by the template wizard (named
MountAttach). - Move it to the relative position where it should attach to the backpack.
8. Change weapon handling#
In the InteractWeapon, click Swing Like Pistol. (it'll modify the grab force and hand speed)
9.Set InteractTriggerX#
- Go to the Parent object
- Scroll down to
InteractTriggerX. - Click
Scriptto show script options. - Make sure the
Lua Scriptvalue starts with your prefix. (soWMD_WeaponFlyObjBaseScriptshould be changed toYOURPREFIX_WeaponFlyObjBaseScript). - Make sure the
String List > flyObjName valuevalue starts with your prefix. (soWMD_Bulletshould be changed toYOURPREFIX_Bullet).
10. shoot position#
ShootPosition determines the position and rotation of where the bullet is fired from.
- Go to
shootPositiontransform and change it rotation and position to your preference.
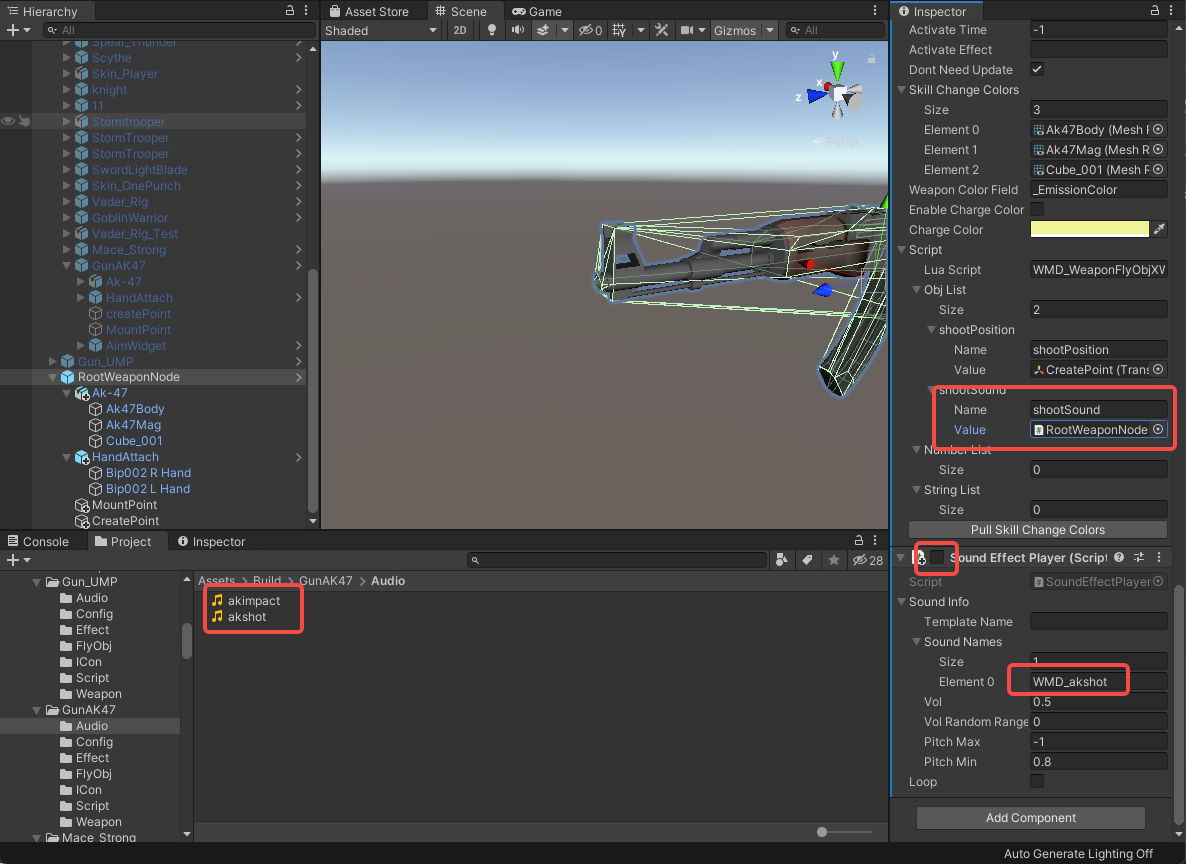
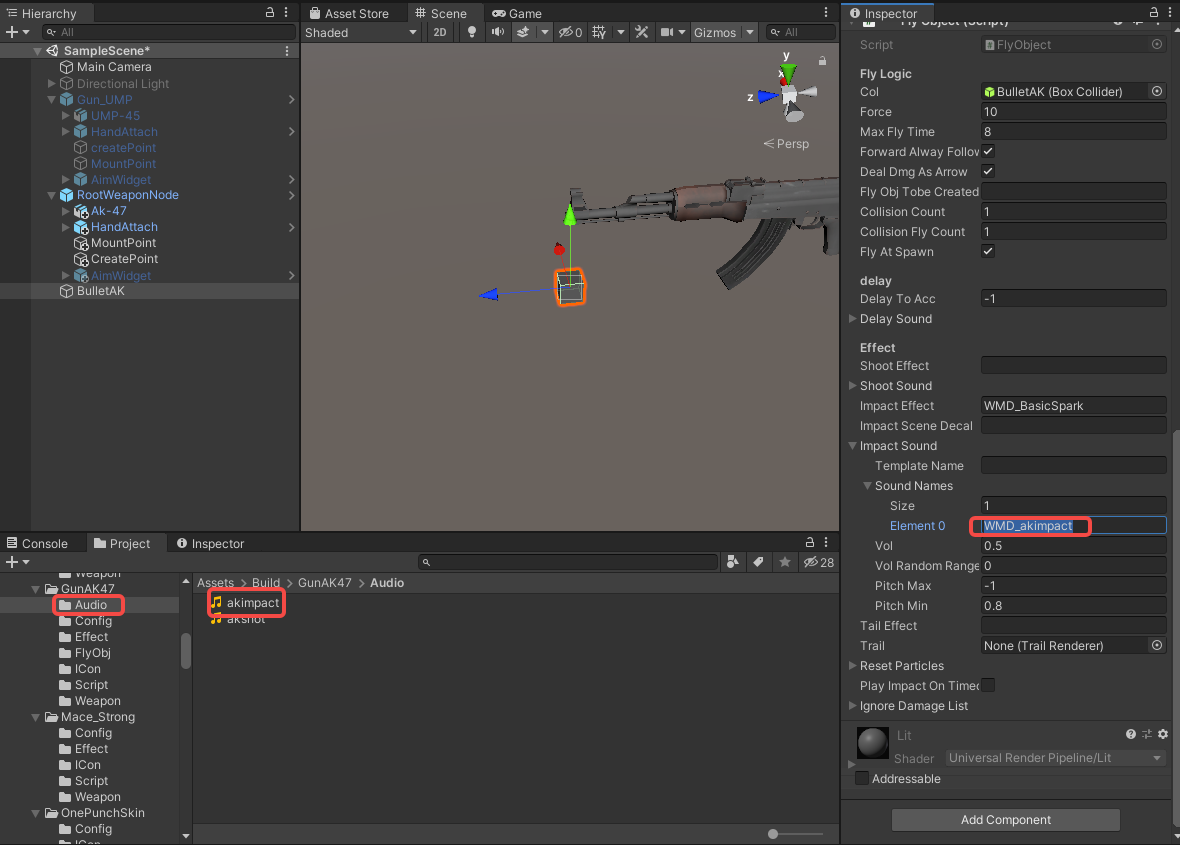
11. Sounds & Effects#
Place your sound files in your Mod's Audio folder, add SoundEffectPlayer to the parent object, set the size of SoundName to 1, fill in Element0 with the prefix + sound "WMD_akshot", and finally reference it to InteractTriggerX's shootSound.
Disable SoundEffectPlayer if you don't need it to play on spawn.
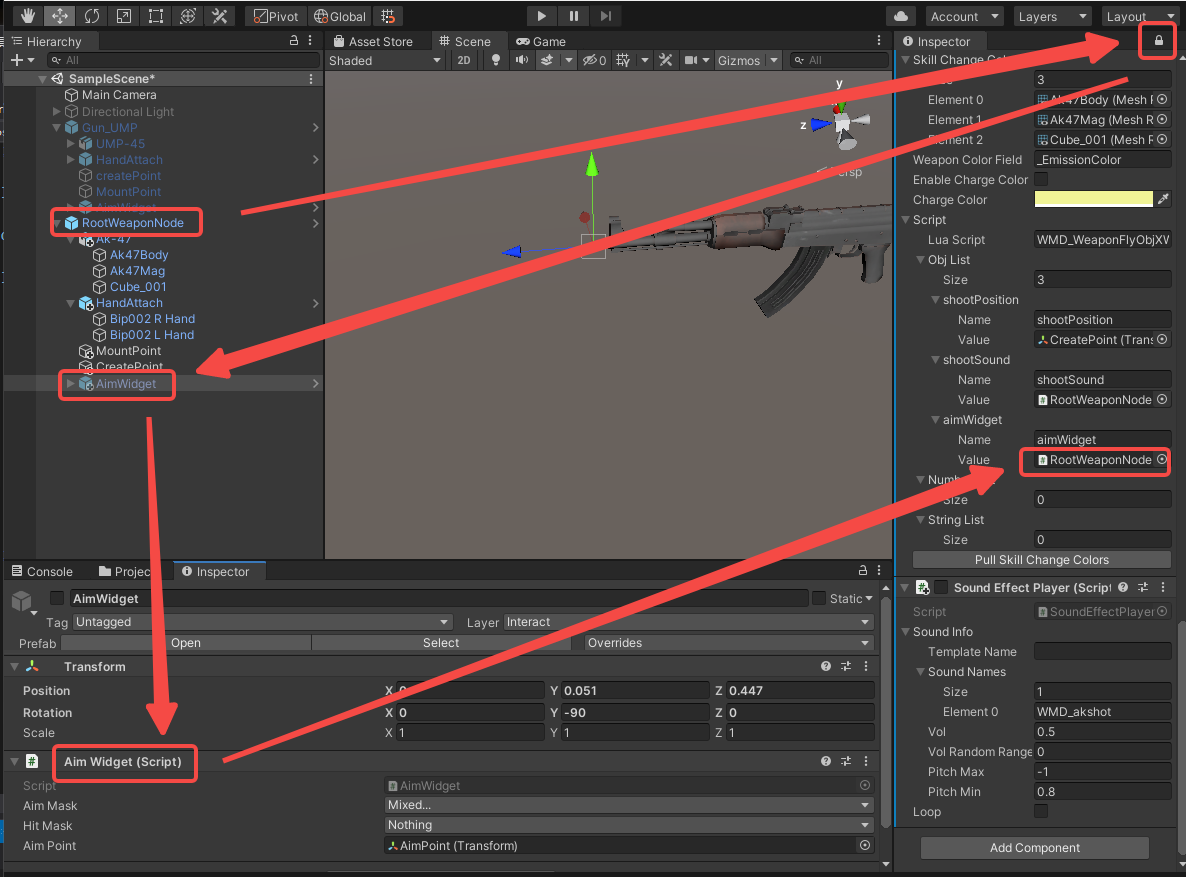
11. AimWidget#
Add AimWidget to the parent object and reposition it to the muzzle of the gun.
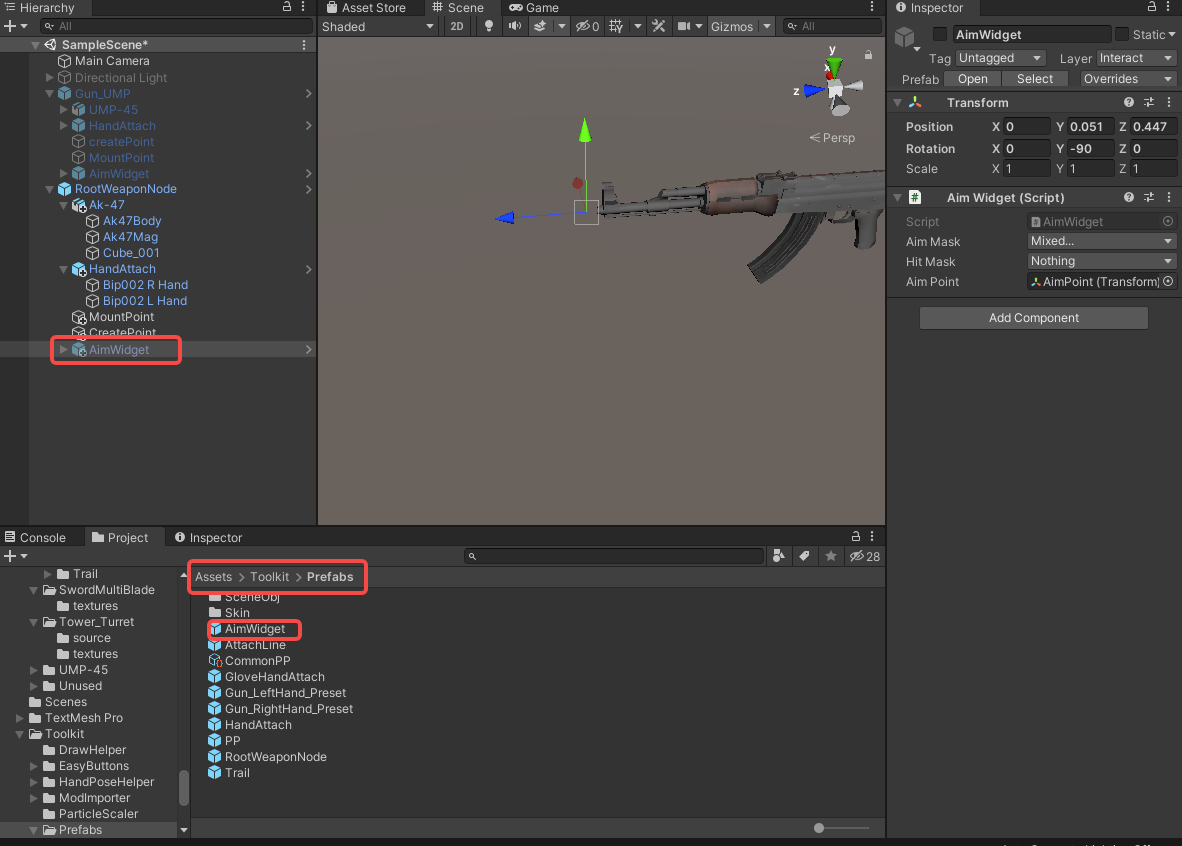
Similarly, select the parent object and lock the panel to set the AimWidget component reference to aimWidget.
10.Create bullet#
Your gun will ofcourse need a bullet.
- A bullet is automatically created for you in the
Build > FlyObjfolder. - Open it and add a custom bullet model to it so it looks good.
- set up ImpactEffect, here we don't cover the creation of the Effect, just use BasicSpark from the project.,you can copy it to the Effect folder of the mod.
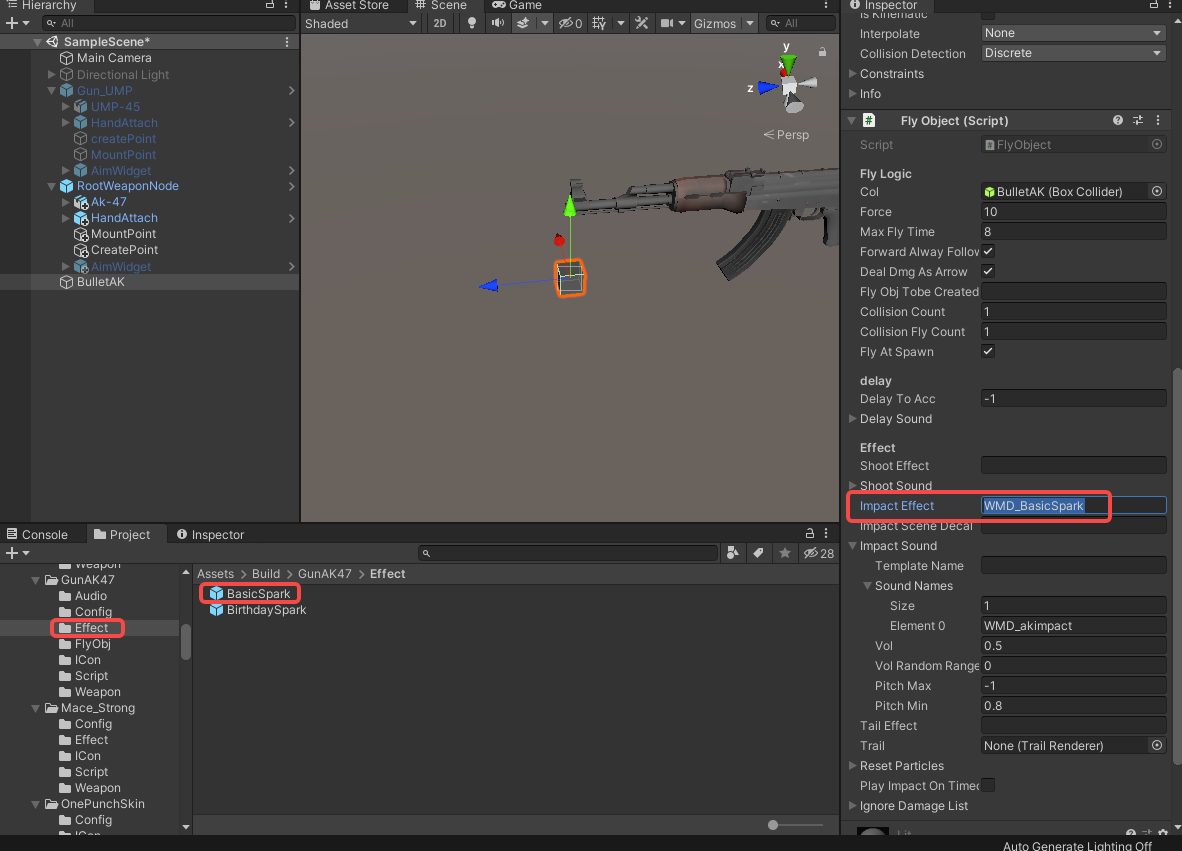
- set up ImpactSound, again you need to place the sound file in the Audio folder of the mod.
Phase 2: Prepare to export your mod#
Generating the icon
- In the Unity Toolbar: Go to
Tools -> Icon Generator. - Drag the
Prefabof your mod (the weapon, avatar, scene) into the field:Game Object To Render. - Adjust the settings of the icon to your liking.
- Click the
Save PNG...button. - Overwrite the dummy icon in folder
IConof your mod that has been created for you previously. (keep the name as is. Don't change this). - Set the Max size to
256and clickApplyto save (yes screenshot shows 128, my bad).
Phase 3: Build the mod#
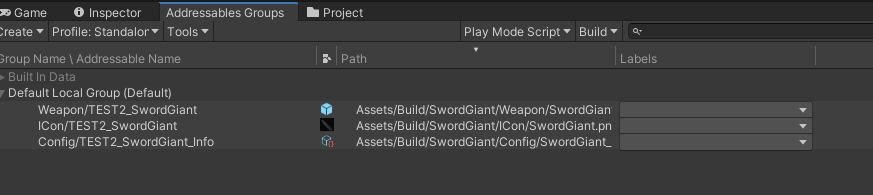
1. Update all addressables.#
- Go to AddressableConfig(
Assets > Resources > AddressableConfig) or use shortcut:ctrl+shift+e. - Click
Clear AddressablesandCreate And Refresh Addressable Name.
Then you will see this tool has already setup addressable path for you in the Addressables Groups window. (Window/Asset Management/Addressables/Groups to open this window)
3. Build#
Click BuildTools > BuildAllBundles to Build.

Once you build it successfully, then you will find your mod in the Assets/Mods. If something errors, please checkout the Console information, unity will tell you what's going wrong. And feel free to ask questions on our discord server.

Phase 4: Test & publish the mod#
1. Install on device#
For PC (Recommend for debugging):
- Make sure you have Battle Talent installed (Steam).
- In Unity: Click
BuildTools>InstallModOnWindows.
For Quest:
- Make sure you have Battle Talent installed on your Quest (Quest store).
- Make sure you've connected your headset correctly.
- Make sure you've allowed sideloading.(if you are not sure how to do this, you can follow this tutorial: https://www.youtube.com/watch?v=RoIXxIfRNTw)
- In Unity: Click
BuildTools>InstallModOnAndroid.

2. Spot the issues via log panel#
Now that it's installed it's time to see if it's working correctly. See if the console gives you some errors. It'll be opened when you toggle Cheat Menu on.

3. Upload your mod to mod.io#
- Zip your mod.
- Go to https://battletalent.mod.io/.
- Click
Add mod. - Authenticate (login).
- Fill in the required fields.