Advanced NPC: Grab Points Configuration
This guide explains how to configure grab points on your NPCs, allowing players or other NPCs to grab, hold, and interact with specific body parts.
Prerequisites
- You have completed the basic Create a Role Mod tutorial.
- You have a working NPC prefab with a proper bone hierarchy.
Phase 1: Add InteractBase Component
1. Select the Target Bone
-
Drag your NPC's prefab into a scene.
-
In the Hierarchy, navigate to the bone where you want the grab point to be located (e.g., chest, arm, shoulder).
2. Add InteractBase Component
- Select the target bone and click
Add Componentto add anInteractBasecomponent.
3. Set as Body Part
-
On the
InteractBasecomponent, clickSetAsBodyPartto automatically configure it as a body part grab point.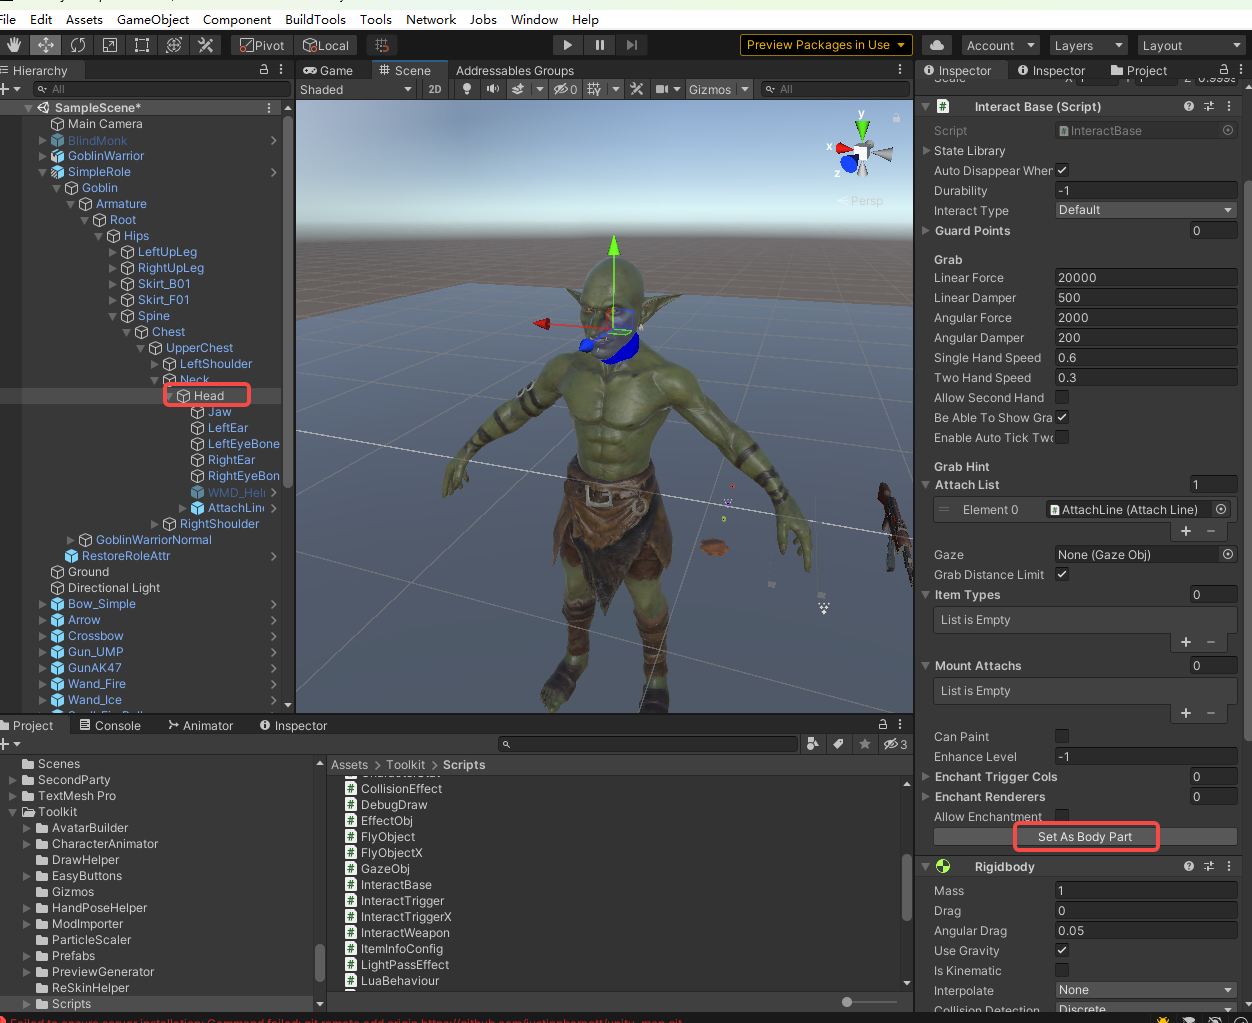
Phase 2: Add Required Components
1. Add Rigidbody
-
Select the same bone and click
Add Componentto add aRigidbodycomponent.Note: The Rigidbody is required for physics-based interactions with the grab point.
2. Configure AttachLine
-
In the Hierarchy, drag the
AttachLineprefab under the target bone as a child object.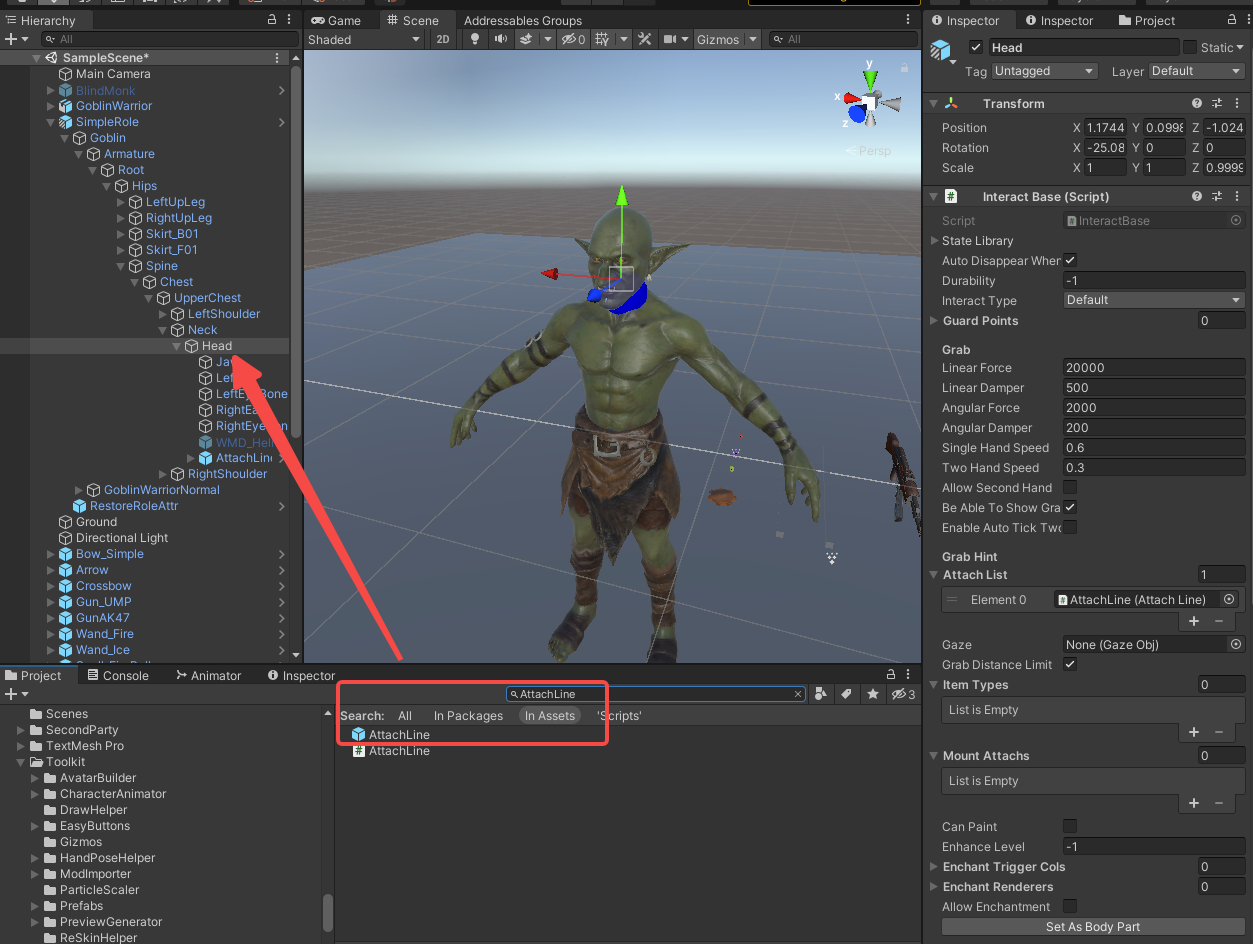
The AttachLine prefab can be found in
Toolkit/InteractBase/AttachLine. -
Adjust
LineStartPointandLineEndPointto define the grab range and visual line position.
Phase 3: Auto-Configure AttachLine
1. Automatic Field Population
-
When both
InteractBaseandRigidbodyare properly configured on the same bone: -
The
AttachLinecomponent will automatically populate itsInteractfield (reference to the parent InteractBase) andselfRBfield (reference to the Rigidbody). -
If the fields do not auto-populate, manually assign them:
-
Drag the parent bone's
InteractBasecomponent into theInteractfield. -
Drag the parent bone's
Rigidbodycomponent into theselfRBfield.
Phase 4: Add RagdollReactAnimation Component
1. Add to Root Node
-
Select your NPC's root object.
-
Click
Add Componentto add aRagdollReactAnimationcomponent.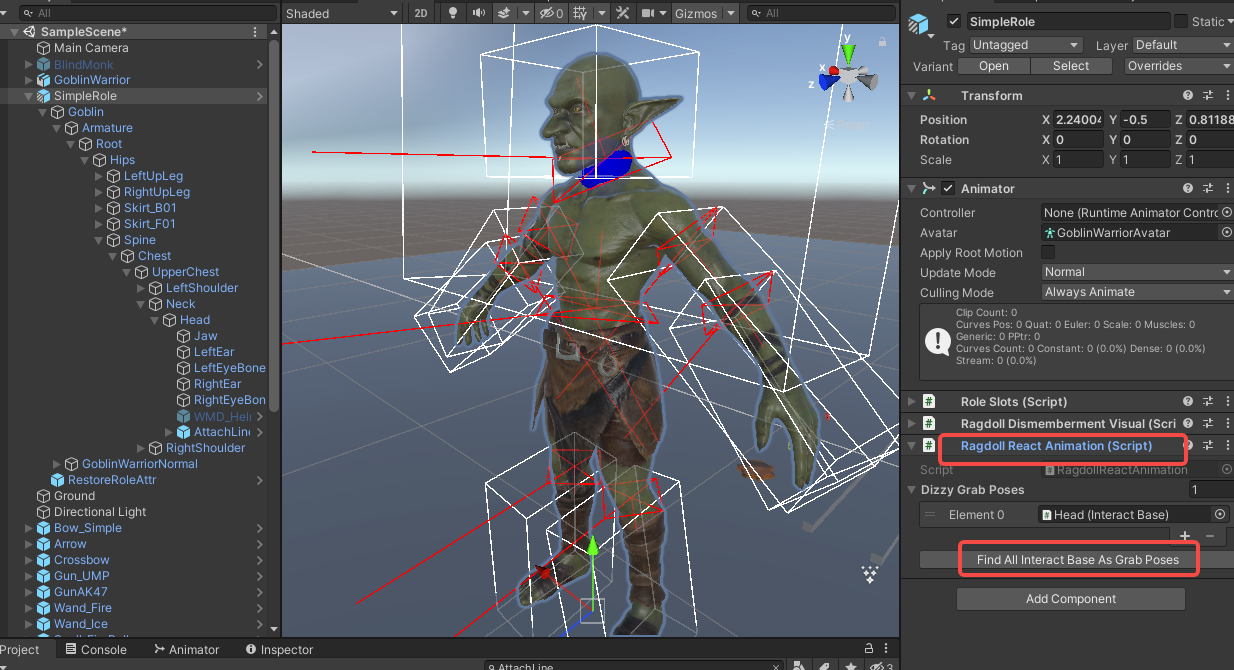
-
On the
RagdollReactAnimationcomponent, clickFindAllInteractBaseAsGrabPoses. -
This will automatically scan your NPC's hierarchy and register all configured
InteractBasecomponents as valid grab poses.
Phase 5: Finalize Mod Configuration
1. Apply to Prefab
- Once all grab points are configured, ensure all components are properly attached and fields are assigned.
- Save or Override the prefab to persist the configuration..
2. Final Build Steps
- Refresh Addressables via
Resources > AddressableConfigand click CreateAndRefreshAddressableName. - Proceed to build your mod via
BuildTools > BuildAllBundles
1. Update all addressables.
- Go to AddressableConfig(
Assets > Resources > AddressableConfig) or use shortcut:ctrl+shift+e. - Click
Clear AddressablesandCreate And Refresh Addressable Name.
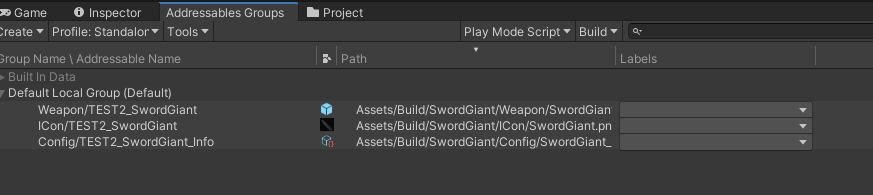
Then you will see this tool has already setup addressable path for you in the Addressables Groups window. (Window/Asset Management/Addressables/Groups to open this window)
3. Build
Click BuildTools > BuildAllBundles to Build.

Once you build it successfully, then you will find your mod in the Assets/Mods. If something errors, please checkout the Console information, unity will tell you what's going wrong. And feel free to ask questions on our discord server.

Phase 6: Test & Publish
1. Install on device
For PC (Recommend for debugging):
- Make sure you have Battle Talent installed (Steam).
- In Unity: Click
BuildTools>InstallModOnWindows.
For Quest:
- Make sure you have Battle Talent installed on your Quest (Quest store).
- Make sure you've connected your headset correctly.
- Make sure you've allowed sideloading.(if you are not sure how to do this, you can follow this tutorial: https://www.youtube.com/watch?v=RoIXxIfRNTw)
- In Unity: Click
BuildTools>InstallModOnAndroid.

2. Spot the issues via log panel
Now that it's installed it's time to see if it's working correctly. See if the console gives you some errors. It'll be opened when you toggle Cheat Menu on.

3. Upload your mod to mod.io
- Zip your mod.
- Go to https://battletalent.mod.io/.
- Click
Add mod. - Authenticate (login).
- Fill in the required fields.