Advanced NPC: Custom Actions
This guide explains how to enhance your NPCs with the Custom Actions system, allowing for complex behaviors like unique attacks, dodges, and interactions.
Prerequisites
- You have completed the basic Create a Role Mod tutorial.
- You have a working NPC prefab and its basic
ItemInfoConfigset up.
Phase 1: Prepare Animation Resources
1. Organize Animation Files
-
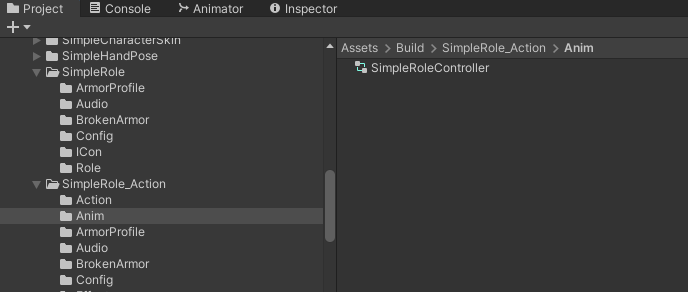
Place your custom
AnimationClipfiles inside a folder underResources. For example:SimpleRole/Anim
-
Create an
Animfolder in your project. Copy theGoblin.controllerfromToolkit/CharacterAnimatorinto this folder and rename it (e.g.,MyRole_Controller).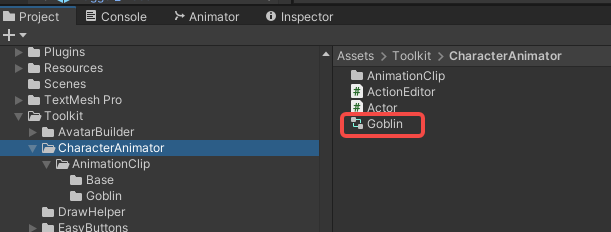
- Note: This allows you to reuse the Goblin's base state machine. Currently, only
Goblin.controlleris provided as a template.
- Note: This allows you to reuse the Goblin's base state machine. Currently, only
Phase 2: Configure Custom Actions
1. Create ActionData
-
Create an
Actionfolder within your mod's project folder (e.g.,Assets/Build/SimpleRole_Action/Action). -
Right-click and select
Create > ActionData. Configure its parameters based on your desired behavior (hover over parameters for tooltips).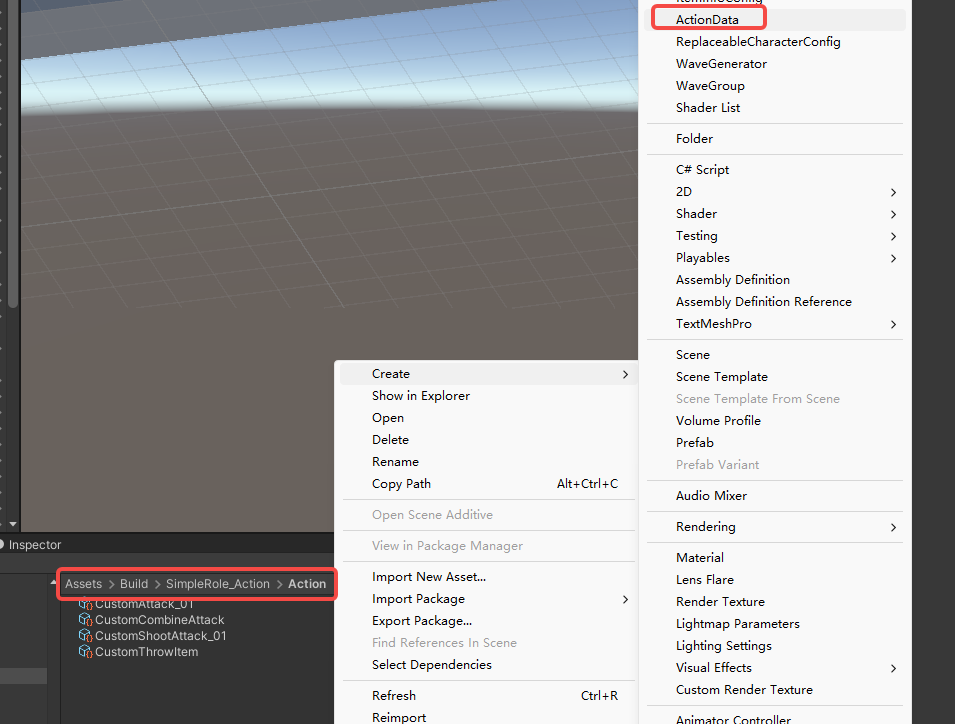
-
CombineList Feature: Use
CombineListto chain multiple simple actions into one complex action. ClickOutputCombineto auto-generate theTimeline.
2. Create and Configure AIPreset
-
In your mod's
configfolder, create anAIPresetfile named after your role (e.g., SimpleRole_AIPreset`).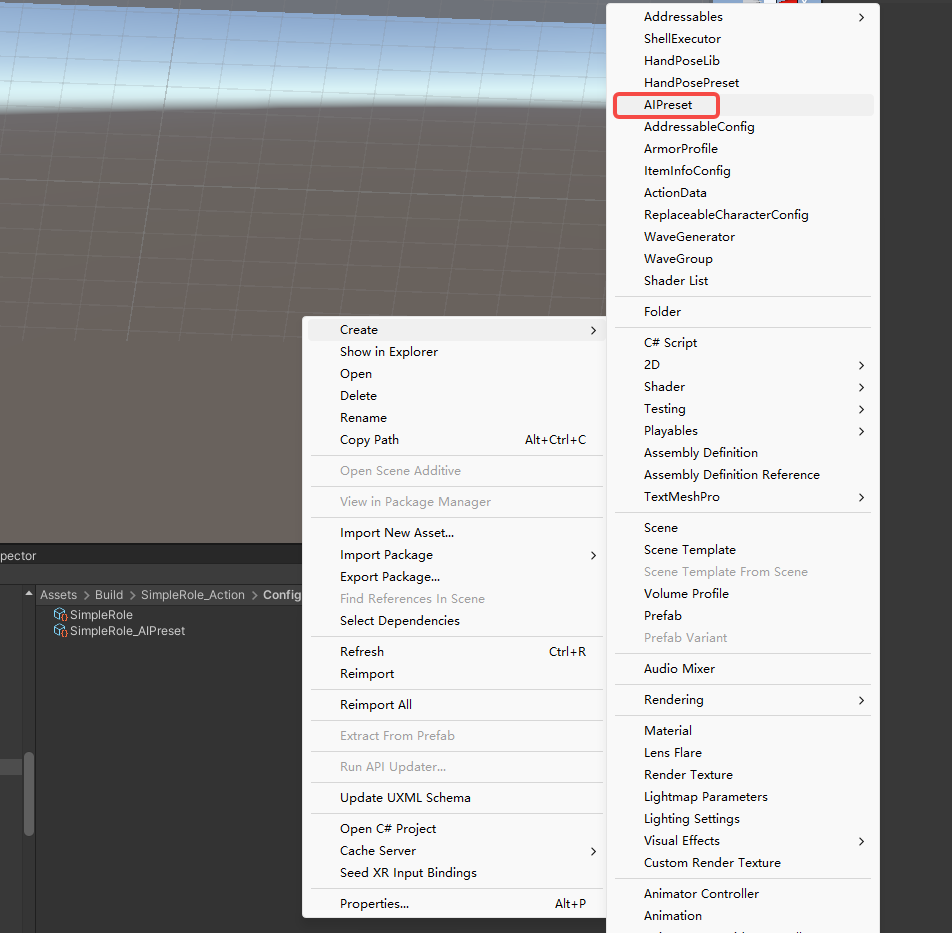
-
Assign Controller: Drag your renamed controller (e.g., SimpleRoleController
) into theController` field.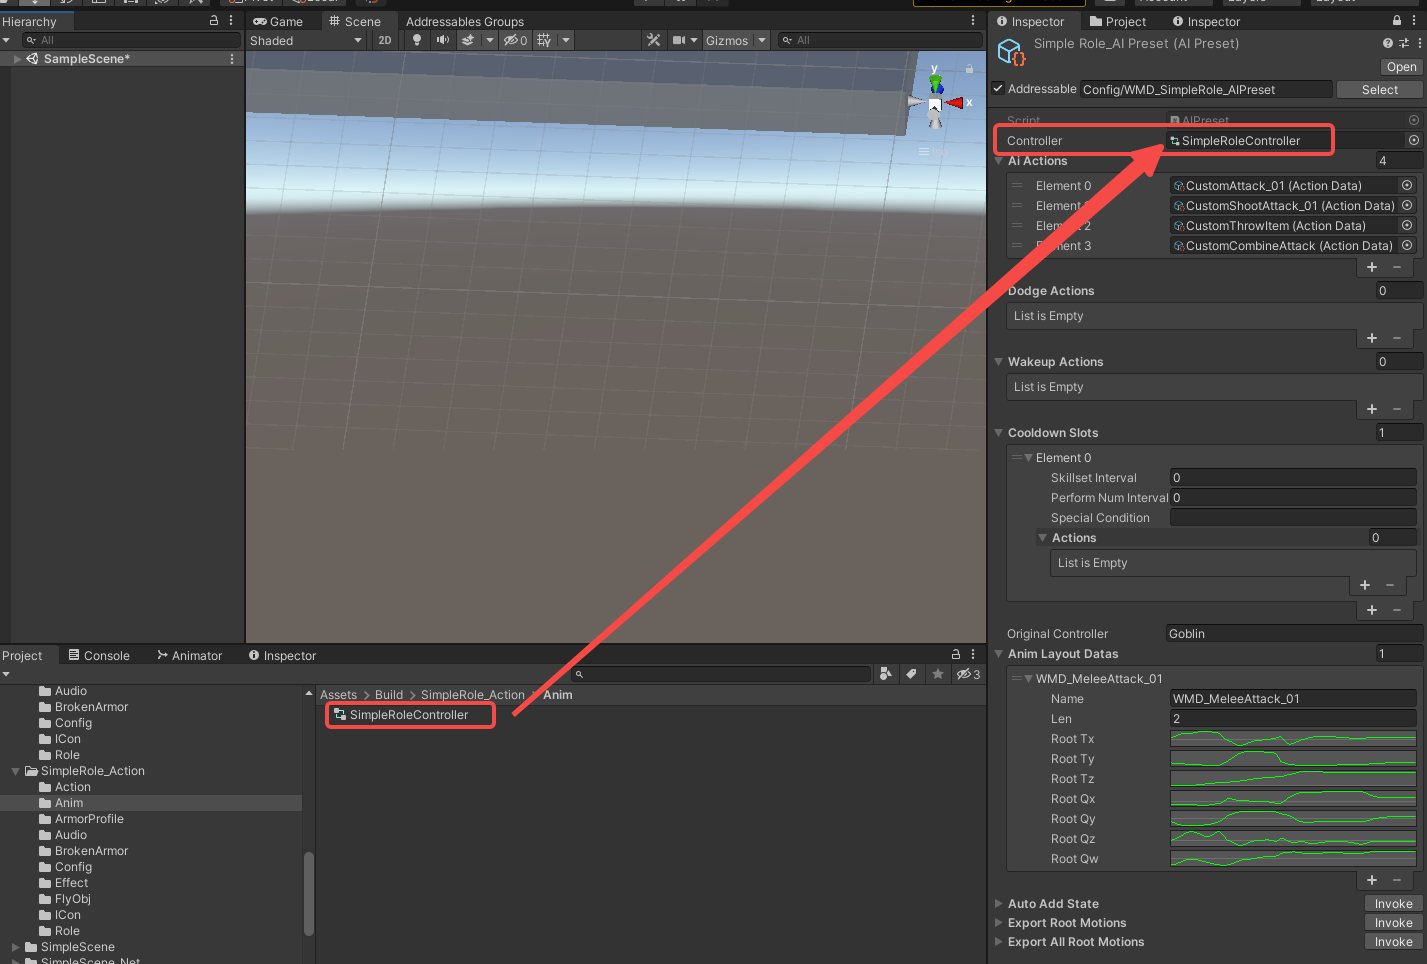
-
Add Actions: Drag your configured
ActionDataassets into theAIActionslist.- Optional: Assign specific actions to the
DodgeActionsandWakeupActionsslots if your NPC needs them. - Optional: Configure cooldowns for actions in the
CooldownSlotslist.
- Optional: Assign specific actions to the
-
Set Original Controller: Since your controller was copied from
Goblin.controller, enter "Goblin" in theOriginalControllerfield. -
Auto-Generate Animation States:
-
In the
AutoAddStatesection, enter the path to yourAnimationClipfolder (e.g.,YourModName/Animations). -
Click Invoke. This will automatically create animation states and assign clips inside your Controller, in this case,
SimpleRoleController.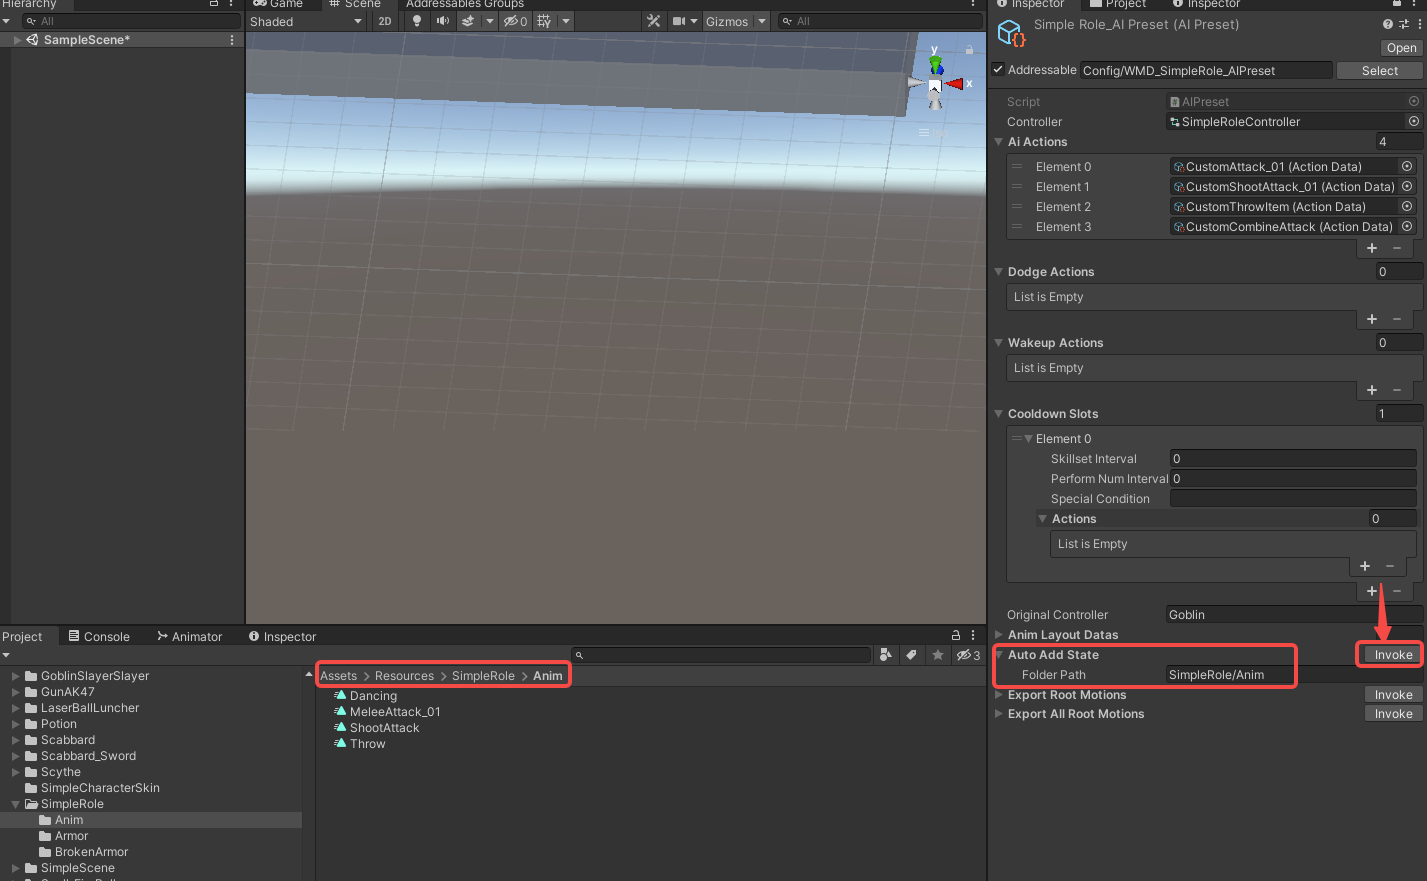
-
-
Generate Root Motion Data:
-
For clips requiring root motion, drag them into the
ExportRootMotionsfield and click Invoke. Data will be inserted intoAnimLayoutDatas.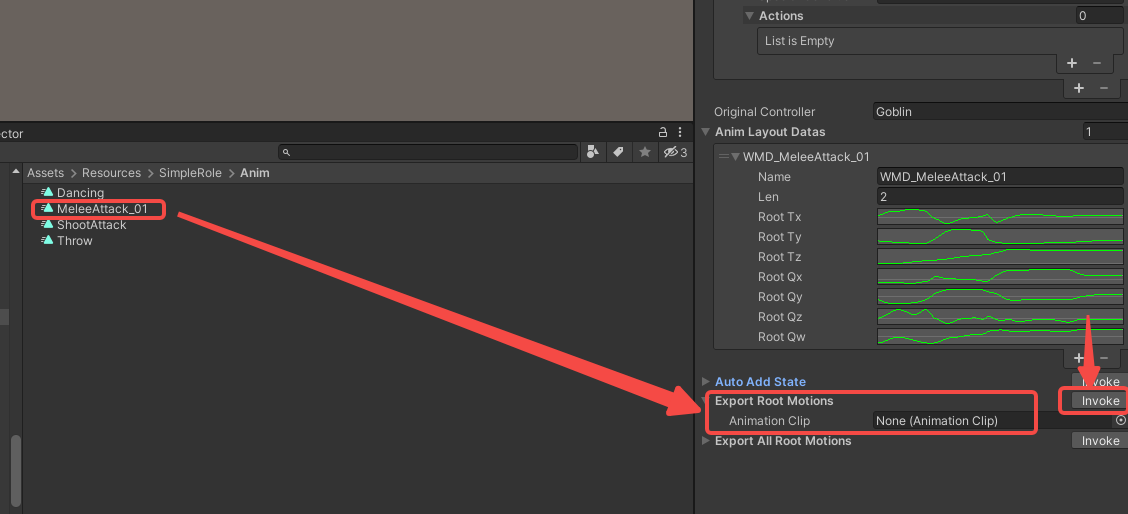
-
For batch processing, Enter the folder path relative to
Resources(e.g.,SimpleRole/Anim) inExportAllRootMotionsand click Invoke.
-
Phase 3: Test Actions In-Editor
1. Setup for Testing
-
Drag your NPC's prefab into a scene.
-
Assign your custom controller (e.g., SimpleRoleController) to the Controller slot of the prefab's
Animatorcomponent. -
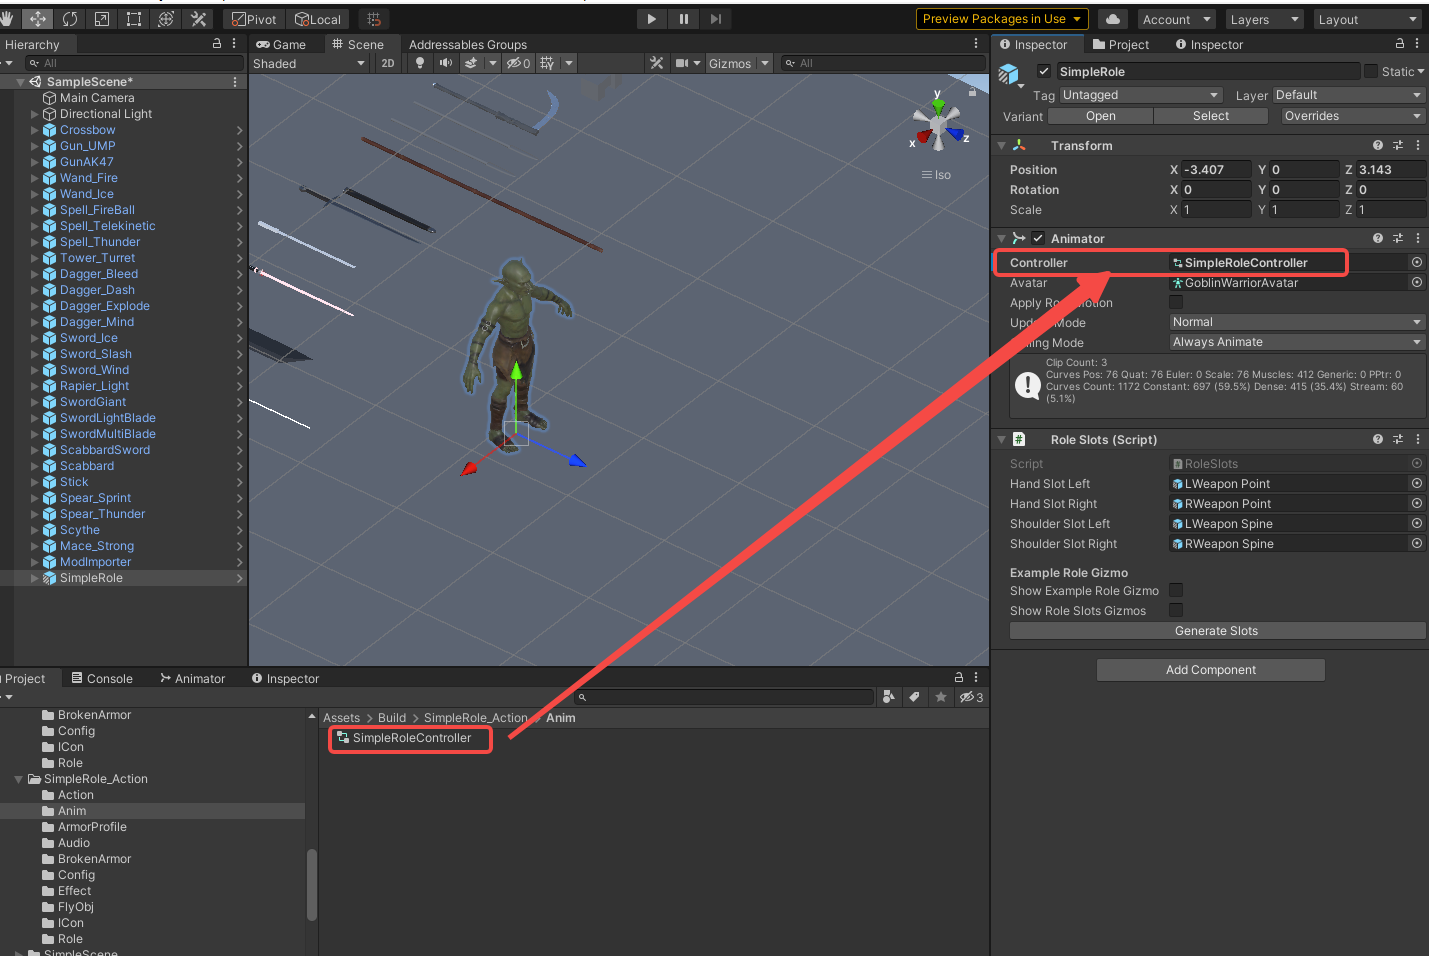
-
Select the prefab's root object and click
Add Componentto add anActionEditorcomponent.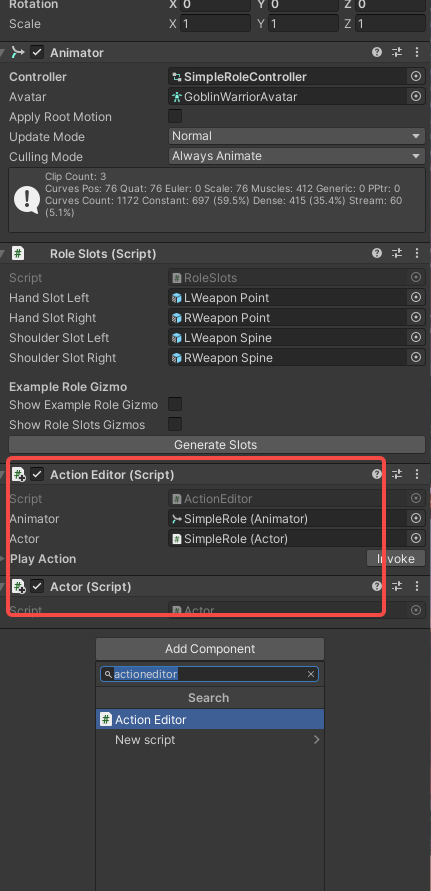
2. Play and Debug
-
Enter Play Mode.
-
With the prefab selected, drag an
ActionDatayou want to test into thePlayActionslot in theActionEditorcomponent. -
Click Invoke to see your NPC perform the action.
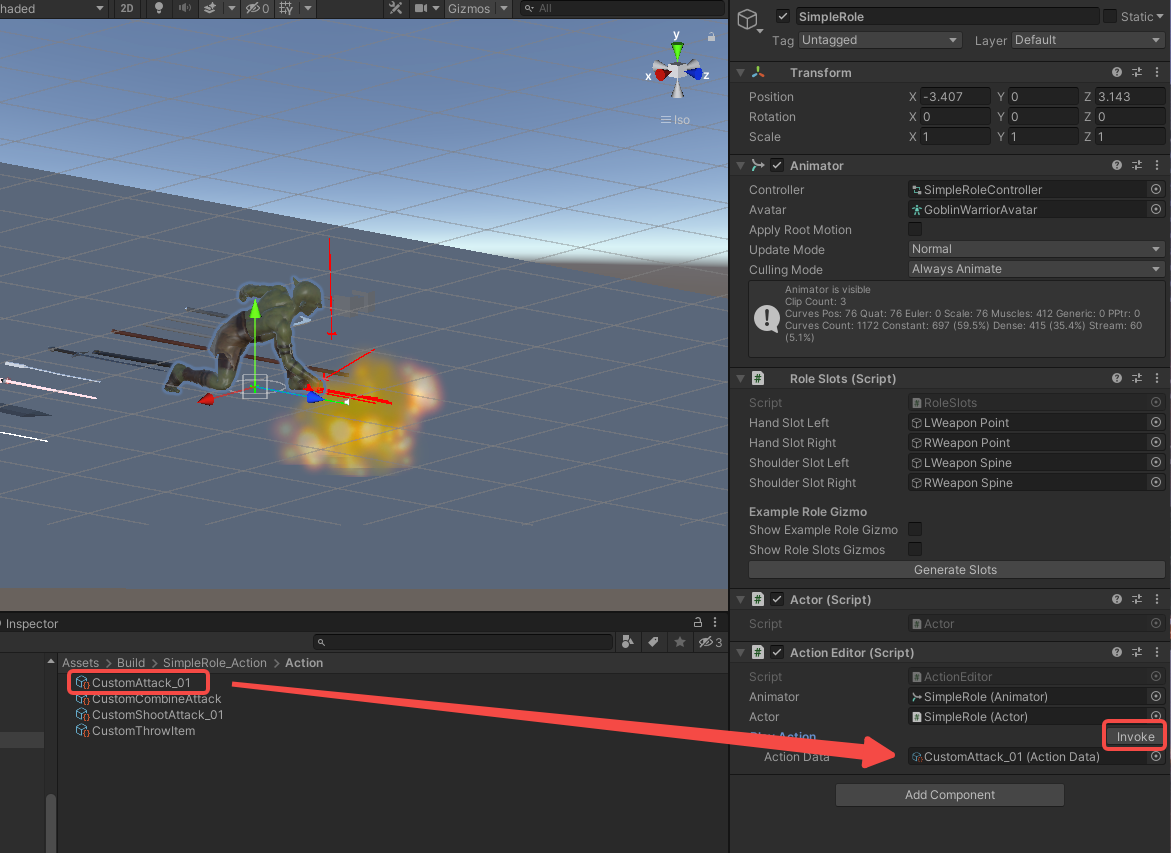
-
You can modify
ActionDataparameters at runtime and click Invoke again to see changes immediately.
Phase 4: Finalize Mod Configuration
1. Link AIPreset to Your Role
-
Open your
ItemInfoConfigfile. -
In your character's
RoleModInfosection, find theAiPresetfield. -
Drag your configured
AIPresetfile (e.g., SimpleRole_AIPreset`) into this slot.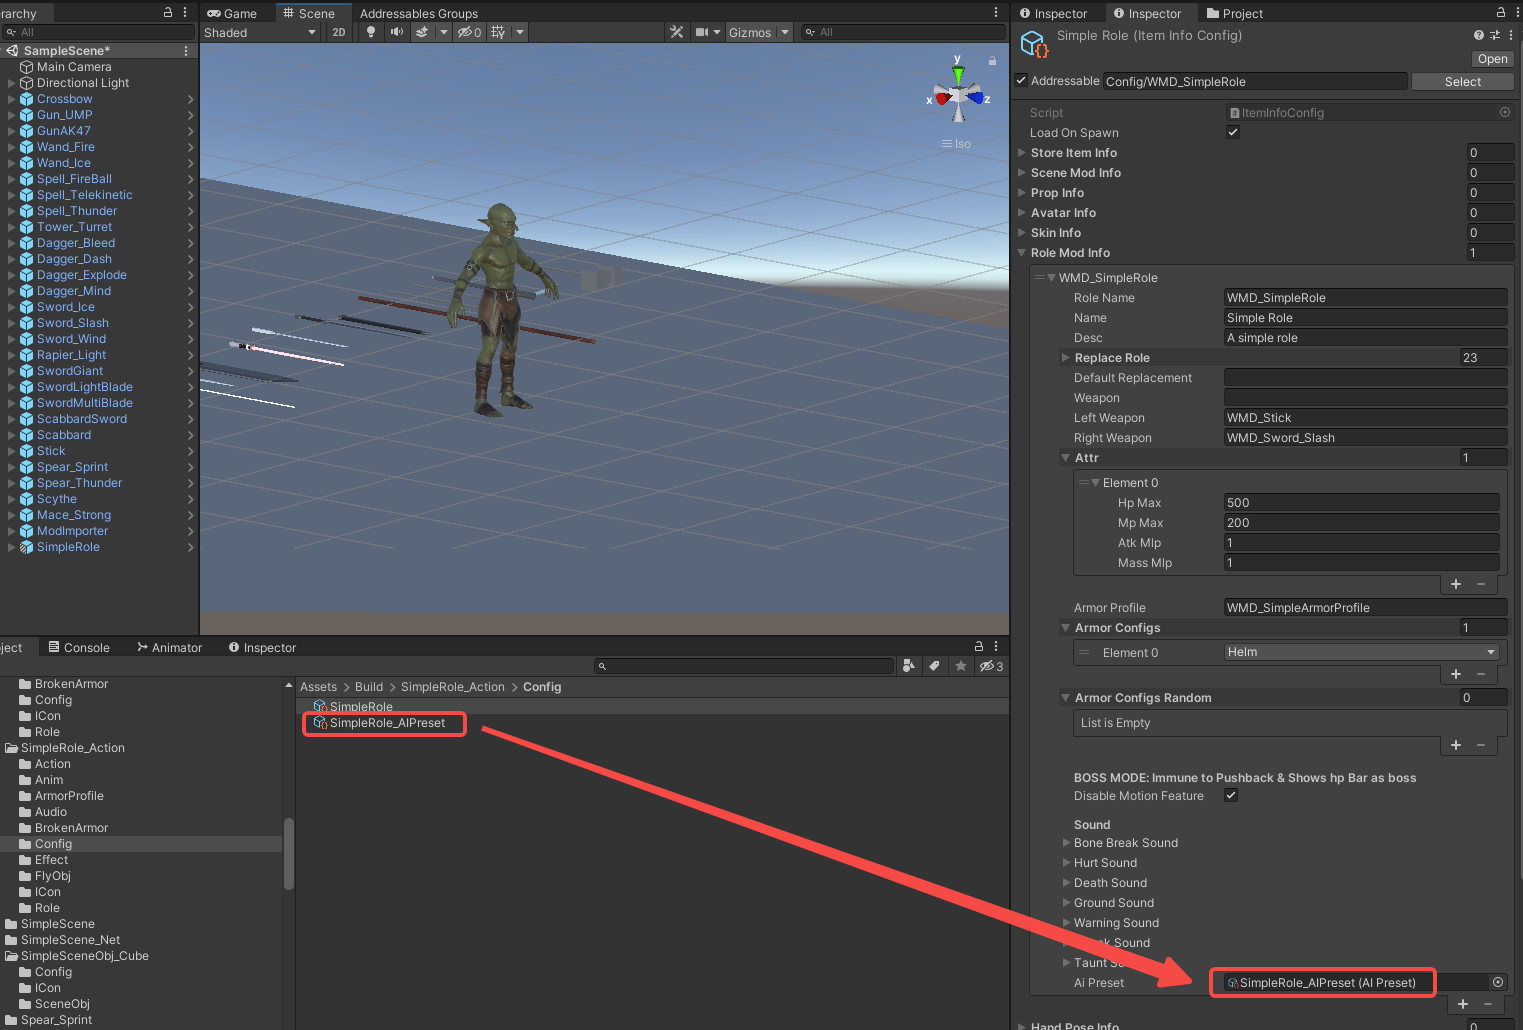
2. Final Build Steps
- Refresh Addressables via
Resources > AddressableConfigand click CreateAndRefreshAddressableName. - Proceed to build your mod.
BuildTools>BuildAllBundles
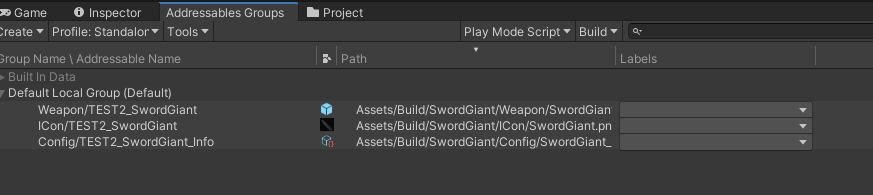
1. Update all addressables.
- Go to AddressableConfig(
Assets > Resources > AddressableConfig) or use shortcut:ctrl+shift+e. - Click
Clear AddressablesandCreate And Refresh Addressable Name.
Then you will see this tool has already setup addressable path for you in the Addressables Groups window. (Window/Asset Management/Addressables/Groups to open this window)
3. Build
Click BuildTools > BuildAllBundles to Build.

Once you build it successfully, then you will find your mod in the Assets/Mods. If something errors, please checkout the Console information, unity will tell you what's going wrong. And feel free to ask questions on our discord server.

Phase 5: Test & Publish
1. Install on device
For PC (Recommend for debugging):
- Make sure you have Battle Talent installed (Steam).
- In Unity: Click
BuildTools>InstallModOnWindows.
For Quest:
- Make sure you have Battle Talent installed on your Quest (Quest store).
- Make sure you've connected your headset correctly.
- Make sure you've allowed sideloading.(if you are not sure how to do this, you can follow this tutorial: https://www.youtube.com/watch?v=RoIXxIfRNTw)
- In Unity: Click
BuildTools>InstallModOnAndroid.

2. Spot the issues via log panel
Now that it's installed it's time to see if it's working correctly. See if the console gives you some errors. It'll be opened when you toggle Cheat Menu on.

3. Upload your mod to mod.io
- Zip your mod.
- Go to https://battletalent.mod.io/.
- Click
Add mod. - Authenticate (login).
- Fill in the required fields.