Create a role mod
Here is a step to make a simple role(NPC) mod.
Phase 1: Define your mod
1. New mod project
Make sure you have the prerequirements for modding and download a fresh ModToolkit to start.
- Download & Install Unity Hub.
- Download & Install Unity (2020.3.48f).
- Download the Battle Talent ModToolkit. (Wanna use git? Check out the repo!)
- Open the downloaded ModToolkit in Unity.
2. Remove unused content
Make sure to remove the demo content so that we have a clean project to start with.
- In the Unity toolbar; click
Tools > Destructive > Cleanup All Content.
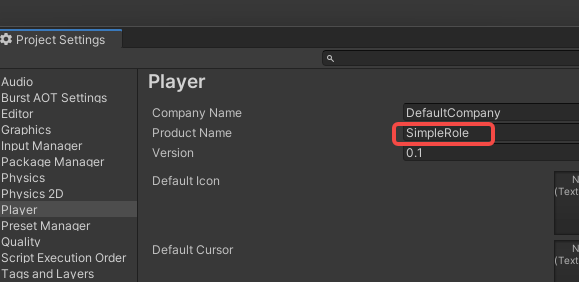
3. Product name
Change the product name so that the mod folder name will not conflict with other mods.
- In the Unity Toolbar: Go to
Edit -> Project Settings -> Player. - Modify field
Product Nameto your new mod name. Use the format:YOURPREFIX_MyModName. Example:WMD_ChevalierWeapons
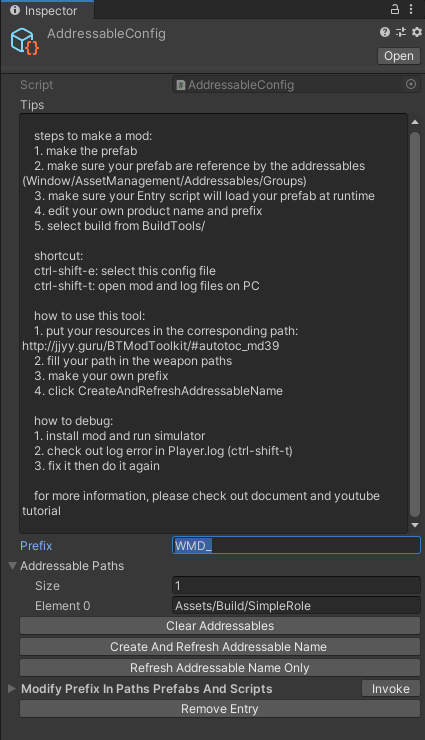
4. Prefix.
Change the project prefix so that the mod files will not conflict with other mods.
-
In the Unity file browser: Open
Assets -> Resources -> AddressableConfig.asset -
Modify field
Prefixto your new prefix name. Use the format:YOURPREFIX_MyModName_. Example:WMD_ChevalierWeapons_Note: The prefix used in the tutorial is
WMD_. You will need to fill in your new prefix instead of everyWMD_in the tutorial.
5.Generate folder structure using the template wizard.
- In the Unity Toolbar: Go to
Tools → Template Wizard. - Make sure the
inspectorwindow is shown (Template Wizard will show there). - Enter a
new mod folder name. Example:YourModName - Set the
Mod Typeto:Role. - Fill in the desired
ItemInfoConfigfields. - Click the
Generate Templatebutton to generate theRolefolder structure.
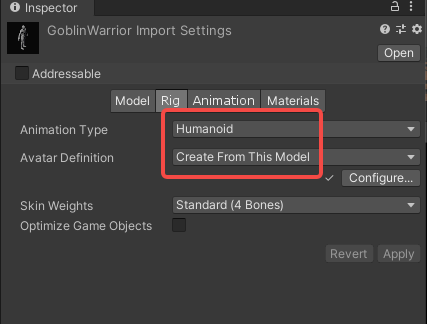
6.Set the Animation Type to humanoid and Avatar Definition to Create From This Model
- Add your custom model to your
Resourcesfolder in Unity. - Change the following settings on the model like the image and click apply.
7.Configure the model into the prefab
- Open the newly created prefab in the
Rolefolder. - Drag your model into it.
- Disable the animator on the model you just added.
- On the prefabs parent object, Make sure the
animatorcomponent has the armature selected of the newly added model.
5.Hand transform configuration
- Open the newly created prefab in the
Rolefolder. - Navigate to the highest object (should be the same as the name of your mod) so that you see component
RoleSlots. - Should look something like this: (button has since then been renamed to
Generate Slotsso you are good.).
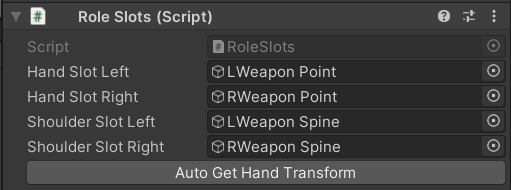
- Click the
Generate Slotsbutton. - Avatar should now show some spheres and lines. those indicate your newly created slots. Adjust the transforms of the variables added to
RoleSlotsto make those fit your avatar better.
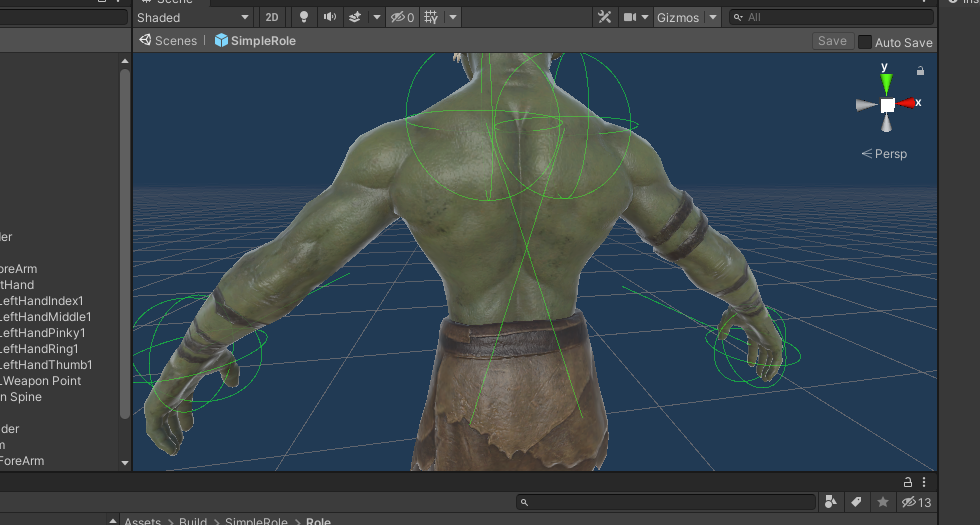
- Save the prefab
Phase 2: Prepare to export your mod
Configuration Setup
-
Create configuration file
-
Navigate to
Assets > Build > YourModName -
Create a
Configfolder -
Right-click in the folder and select:
Create > ItemInfoConfig -
Rename the config file to match your character name
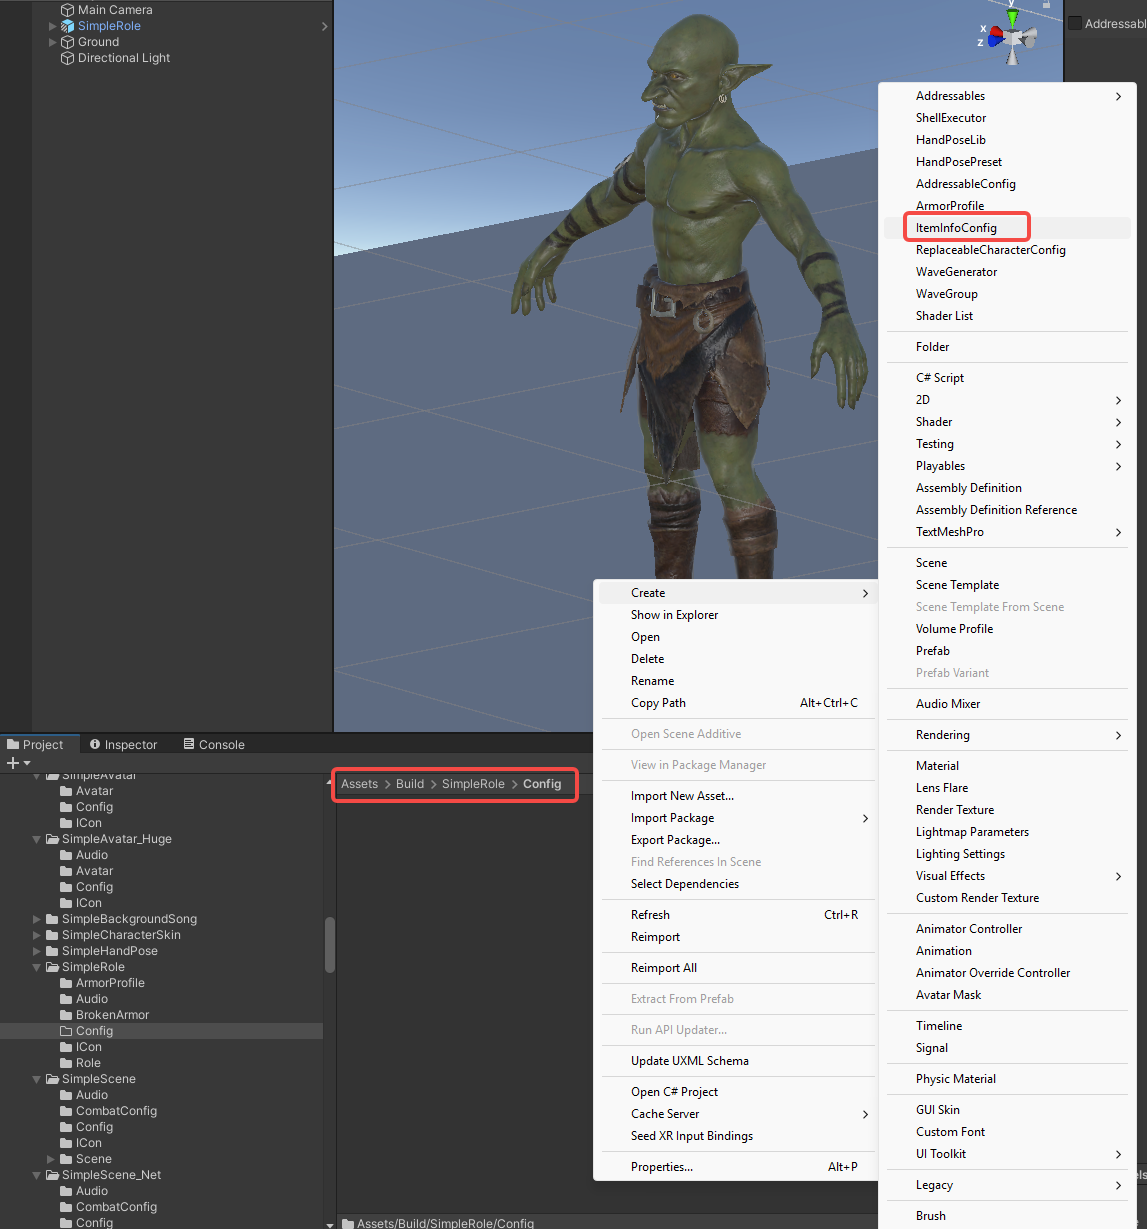
-
Click the
+button in theRoleModInfosection to create character configuration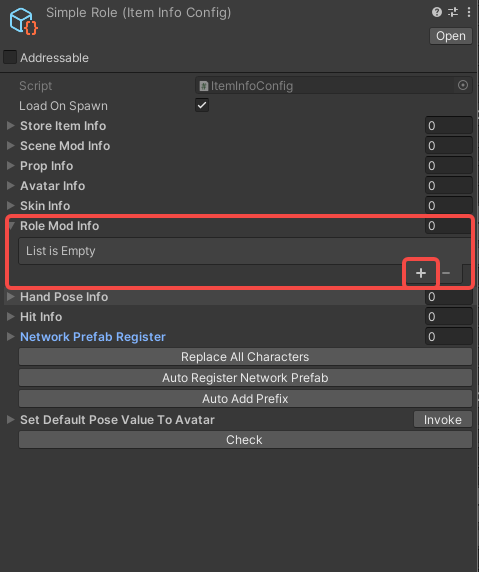
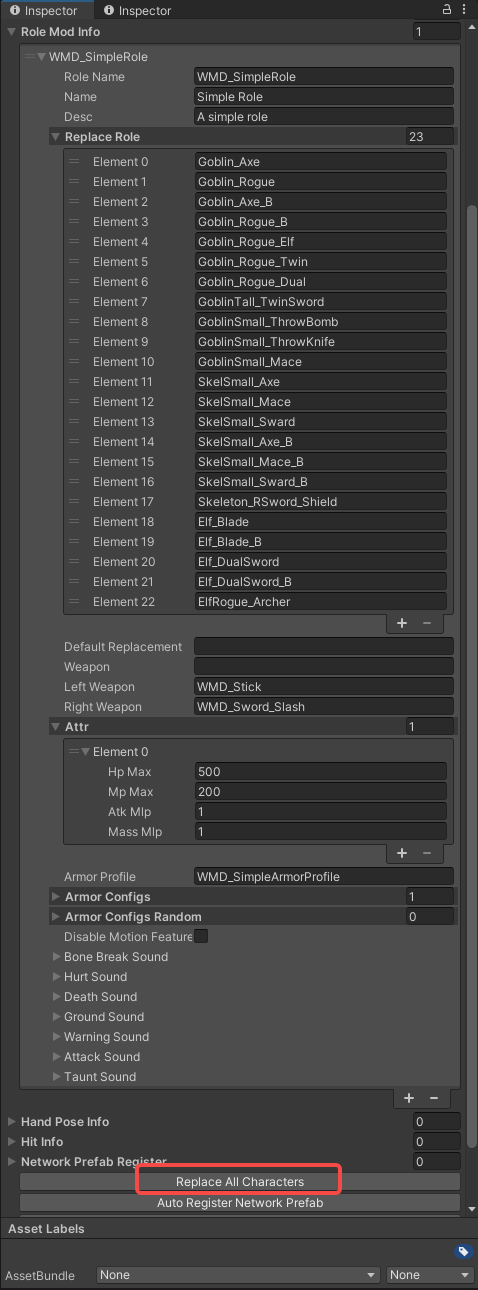
2. Configure character properties
Fill in the following fields in your ItemInfoConfig:
-
Basic Settings:
roleName: Your character prefab's exact name (prefix + name format)Name: Display name that appears in-gameDesc: Character description shown in-game
-
Role Replacement:
ReplaceRole: Existing characters this mod will replace- Click
ReplaceAllCharactersbutton to auto-populate - Manually add/remove entries as needed
- Click
DefaultReplacement: Default character being replaced
-
Combat Setup:
Weapon: Default weaponLeftWeapon: Overrides left hand weapon (optional)RightWeapon: Overrides right hand weapon (optional)
-
Attributes:
Attr > HpMax: Maximum health pointsAttr > MpMax: Maximum mana pointsAttr > AtkMlp: Damage multiplierAttr > MassMlp: Mass multiplier
-
Armor Configuration: (Armor Tutorial )
ArmorProfile: Reference to your armor configurationArmorConfigs: Default armor sets (requires ArmorProfile)ArmorConfigsRandom: Random armor variations (requires ArmorProfile)
-
Special Flags:
DisableMotionFeature: Enable for boss characters (prevents knockback)
-
Audio (Optional):
Sound: Configure character-specific sound effects
Generating the icon
- In the Unity Toolbar: Go to
Tools → Icon Generator. - Drag the
Prefabof your mod (the weapon, avatar, scene) into the field:Game Object To Render. - Adjust the settings of the icon to your liking.
- Click the
Save PNG...button. - Overwrite the dummy icon in folder
IConof your mod that has been created for you previously. (keep the name as is. Don't change this). - Set the Max size to
256and clickApplyto save (yes screenshot shows 128, my bad).
Phase 3: Build the mod
1. Update all addressables.
- Go to AddressableConfig(
Assets > Resources > AddressableConfig) or use shortcut:ctrl+shift+e. - Click
Clear AddressablesandCreate And Refresh Addressable Name.
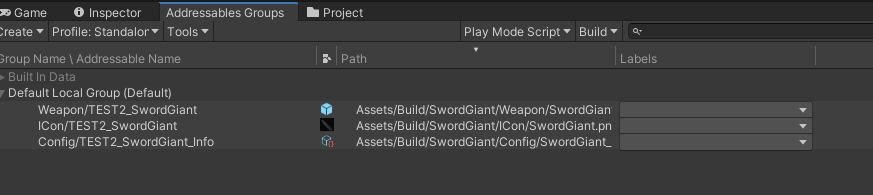
Then you will see this tool has already setup addressable path for you in the Addressables Groups window. (Window/Asset Management/Addressables/Groups to open this window)
3. Build
Click BuildTools > BuildAllBundles to Build.

Once you build it successfully, then you will find your mod in the Assets/Mods. If something errors, please checkout the Console information, unity will tell you what's going wrong. And feel free to ask questions on our discord server.

Phase 4: Test & publish the mod
1. Install on device
For PC (Recommend for debugging):
- Make sure you have Battle Talent installed (Steam).
- In Unity: Click
BuildTools>InstallModOnWindows.
For Quest:
- Make sure you have Battle Talent installed on your Quest (Quest store).
- Make sure you've connected your headset correctly.
- Make sure you've allowed sideloading.(if you are not sure how to do this, you can follow this tutorial: https://www.youtube.com/watch?v=RoIXxIfRNTw)
- In Unity: Click
BuildTools>InstallModOnAndroid.

2. Spot the issues via log panel
Now that it's installed it's time to see if it's working correctly. See if the console gives you some errors. It'll be opened when you toggle Cheat Menu on.

3. Upload your mod to mod.io
- Zip your mod.
- Go to https://battletalent.mod.io/.
- Click
Add mod. - Authenticate (login).
- Fill in the required fields.