Advanced NPC: Dismemberment System
This guide explains how to implement dynamic dismemberment for your NPCs, allowing body parts to be severed during combat for enhanced visual feedback and gameplay mechanics.
Prerequisites
- You have completed the basic Create a Role Mod tutorial.
- You have a working NPC prefab with SkinnedMeshRenderer components.
- Your character model has a proper bone hierarchy.
Phase 1: Setup Dismemberment Component
1. Add RagdollDismembermentVisual Component
-
Drag your NPC's prefab into a scene.
-
Select the prefab's root object and click
Add Componentto add aRagdollDismembermentVisualcomponent.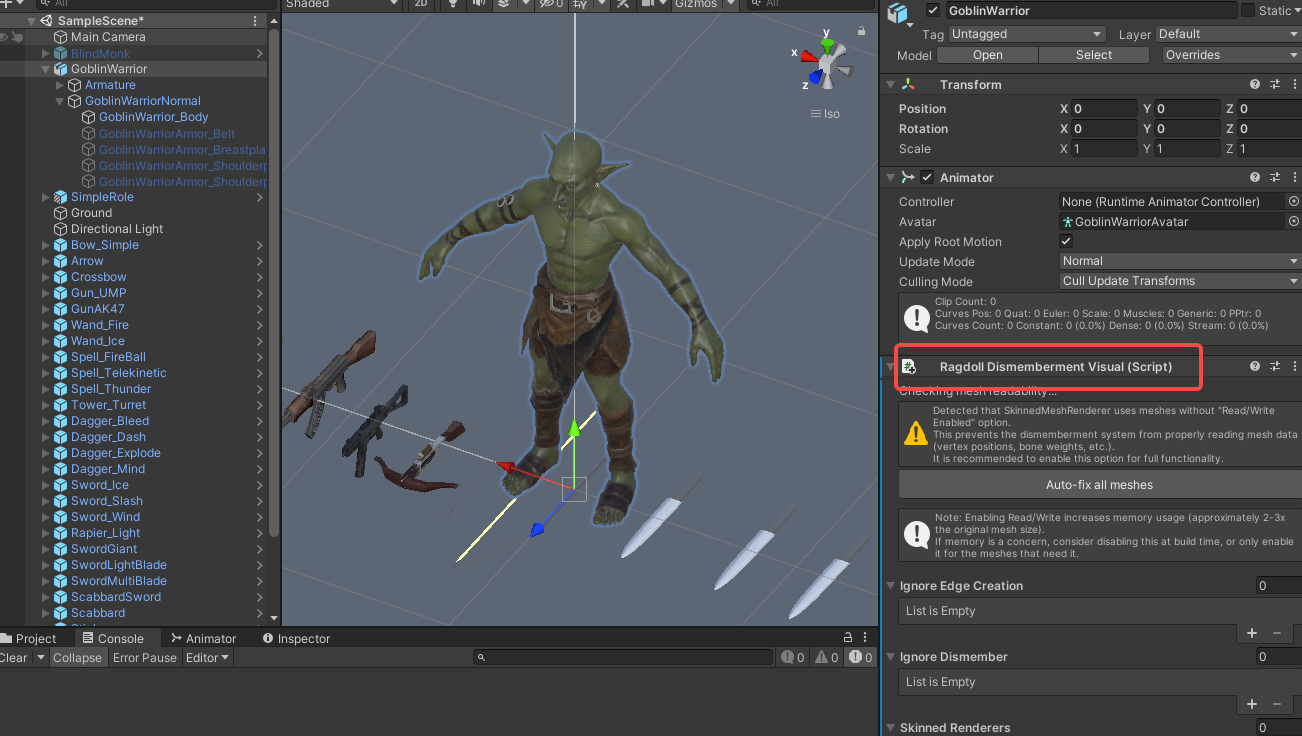
2. Fix Mesh Read/Write Settings
-
If your character's meshes do not have Read/Write enabled, a warning will appear in the component.
-
Click the
Auto-fix all meshesbutton that appears to automatically enable Read/Write on all required meshes.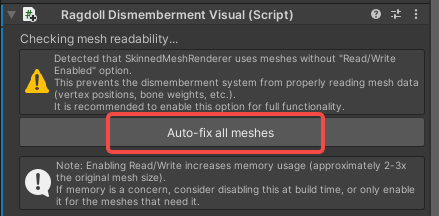
Note: This step is essential. Dismemberment requires access to mesh data at runtime.
3. Configure Basic Settings
-
Ignore Edge Creation: Skinned mesh renderers that should not generate cap geometry on cut edges.
-
Ignore Dismember: Skinned mesh renderers that should be skipped entirely during dismemberment.
Phase 2: Configure Fragment Root
The ROOT fragment serves as the parent container for all dismemberable body parts.
1. Add ROOT Fragment
-
In the
RagdollDismembermentVisualcomponent, clickAdd Fragment. -
Name the new fragment
ROOT.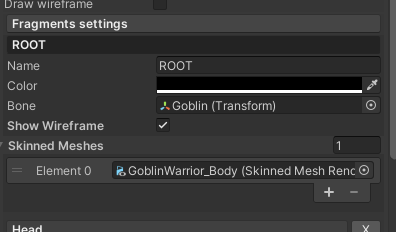
2. Configure ROOT Settings
-
Bone: Drag the root bone of your character's skeleton into this field
-
SkinnedMeshes: Add all
SkinnedMeshRenderercomponents that can potentially be dismembered to this list.
Phase 3: Configure Dismemberable Body Parts
Once ROOT is configured, you can add individual body parts like head, arms, legs, etc.
1. Add a Fragment
-
Click
Add Fragmentto create a new fragment. -
Give it a descriptive name (
Head,LeftUpperArm,LeftForeArmRightUpperArmRightForeArmLeftCalfRightCalfSpine2).
2. Configure Bone Binding
- Bone: Drag the corresponding bone for this body part into the field (e.g., for Head fragment, drag the "Head" bone).
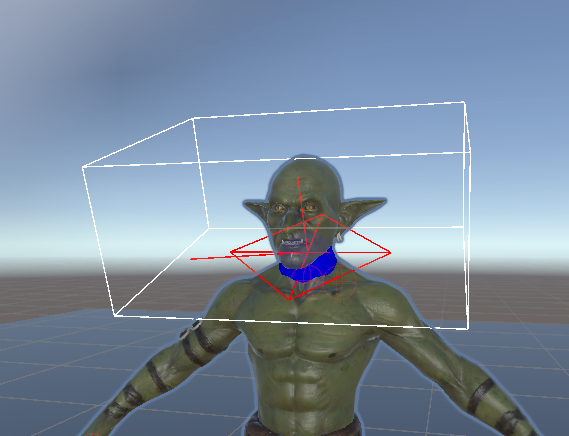
3. Configure Cut Parameters
The following parameters control how the dismemberment cut is performed. Visual guides (helper lines) will appear in the Scene view when a fragment is selected, allowing you to see the effect of your adjustments in real-time.
| Parameter | Description |
|---|---|
| cutRadius | Radius of the cutting area used to determine which nearby vertices are affected. |
| cutAngleOnBinormal | Rotation angle around the cut binormal used to fine-tune the cut direction. |
| cutPlanePos | Cut plane position in the local space of the fragment bone. |
| cutPlaneNormal | Cut plane normal direction in the local space of the fragment bone. |
| cutPlaneBinormal | Cut plane binormal direction in the local space of the fragment bone, used as the rotation reference. |
| Position | Center of the fragment bounds in bone local space, used for setup and visualization. |
| Rotation | Euler rotation of the fragment bounds, used for editor visualization. |
| Size | Size of the fragment bounds, used for setup and visualization. |
4. Use Auto-Sizing Tools
To speed up setup, use the helper buttons to automatically calculate initial bounds:
-
AutomaticBounds: Automatically calculates the Position and Size based on the bone's associated mesh geometry. -
AutomaticSize: Automatically calculates only the Size parameter based on mesh geometry.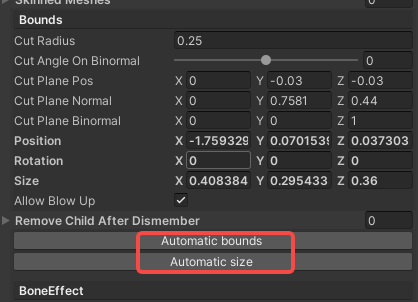
Tip: After using auto tools, fine-tune the parameters manually while observing the visual guides in the Scene view.
Phase 4: Preview Dismemberment
Before building your mod, preview the dismemberment effect directly in the Unity Editor.
1. Open Dismemberment Preview Tool
-
Navigate to
Tools > ModToolkit > DismemberPreviewin the top menu.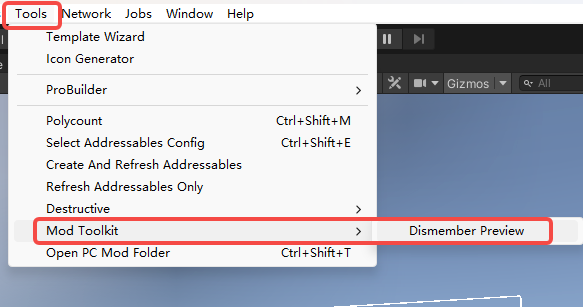
2. Select and Preview a Fragment
-
In the preview window, use the Fragment dropdown menu to select the body part you want to test.
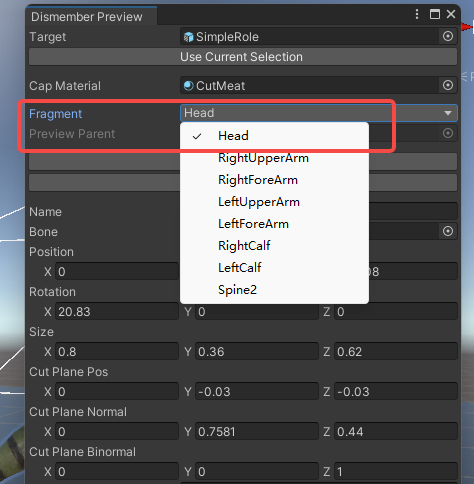
-
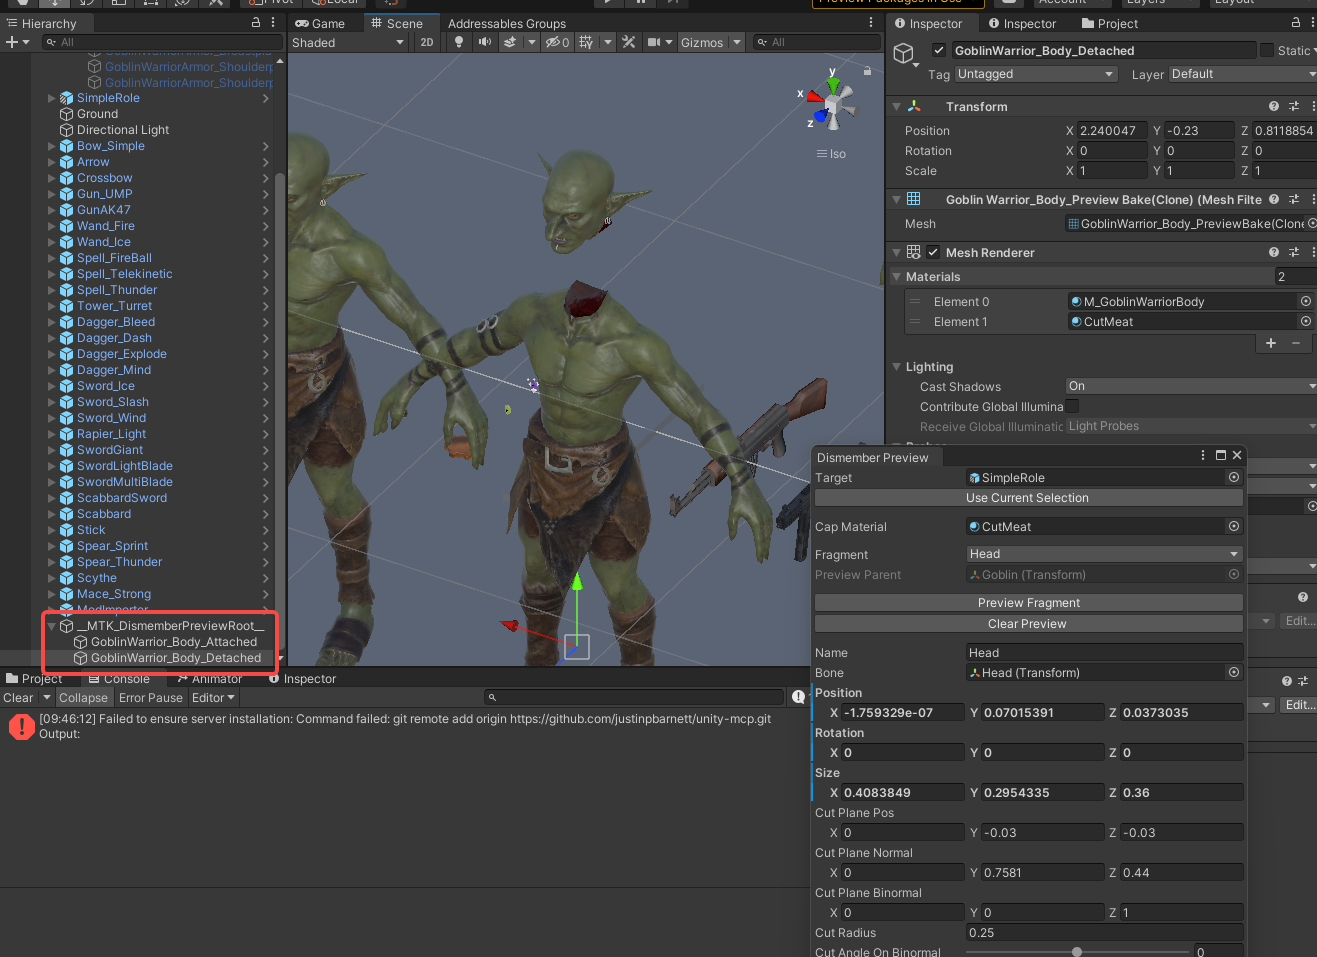
Click
PreviewFragmentto see the dismemberment effect applied to your NPC in the Scene view.
3. Iterate on Parameters
-
If the preview result looks incorrect (e.g., jagged cuts, wrong body part severed), return to the
RagdollDismembermentVisualcomponent. -
Adjust the fragment's cut parameters and click
PreviewFragmentagain to see the updated result. -
Repeat until you achieve the desired visual effect.
Phase 5: Finalize Mod Configuration
1. Apply to Prefab
- Once you are satisfied with all fragment configurations, ensure the
RagdollDismembermentVisualcomponent is attached to your NPC's prefab root. - Save or Override the prefab to persist the configuration.
2. Final Build Steps
- Refresh Addressables via
Resources > AddressableConfigand click CreateAndRefreshAddressableName. - Proceed to build your mod via
BuildTools > BuildAllBundles
1. Update all addressables.
- Go to AddressableConfig(
Assets > Resources > AddressableConfig) or use shortcut:ctrl+shift+e. - Click
Clear AddressablesandCreate And Refresh Addressable Name.
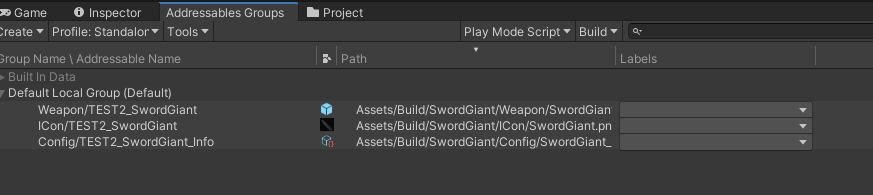
Then you will see this tool has already setup addressable path for you in the Addressables Groups window. (Window/Asset Management/Addressables/Groups to open this window)
3. Build
Click BuildTools > BuildAllBundles to Build.

Once you build it successfully, then you will find your mod in the Assets/Mods. If something errors, please checkout the Console information, unity will tell you what's going wrong. And feel free to ask questions on our discord server.

Phase 6: Test & Publish
1. Install on device
For PC (Recommend for debugging):
- Make sure you have Battle Talent installed (Steam).
- In Unity: Click
BuildTools>InstallModOnWindows.
For Quest:
- Make sure you have Battle Talent installed on your Quest (Quest store).
- Make sure you've connected your headset correctly.
- Make sure you've allowed sideloading.(if you are not sure how to do this, you can follow this tutorial: https://www.youtube.com/watch?v=RoIXxIfRNTw)
- In Unity: Click
BuildTools>InstallModOnAndroid.

2. Spot the issues via log panel
Now that it's installed it's time to see if it's working correctly. See if the console gives you some errors. It'll be opened when you toggle Cheat Menu on.

3. Upload your mod to mod.io
- Zip your mod.
- Go to https://battletalent.mod.io/.
- Click
Add mod. - Authenticate (login).
- Fill in the required fields.
Troubleshooting
| Issue | Solution |
|---|---|
| Warning about Read/Write | Click the Auto-fix all meshes button in the component |
| Preview shows no effect | Ensure ROOT fragment is properly configured with bone and SkinnedMeshes |
| Cut looks jagged | Increase mesh quality or adjust cutRadius and cut plane parameters |
| Wrong body part is severed | Verify the correct bone is assigned to the fragment |
| Fragment bounds helpers not visible | Select the node that has the RagdollDismembermentVisual component attached |